Concrete Fence Post Extenders
A DIY project to extend the height of an existing fence to provide more privacy in a garden.
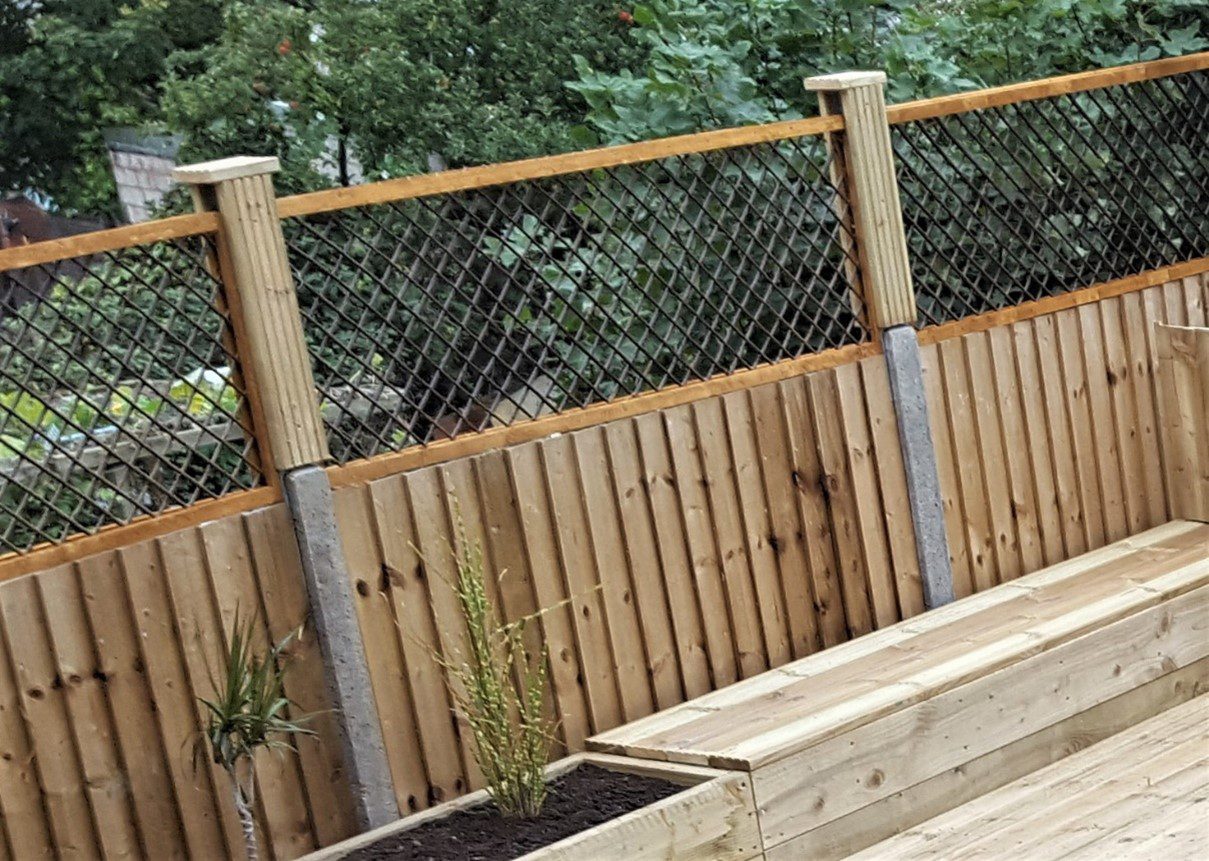
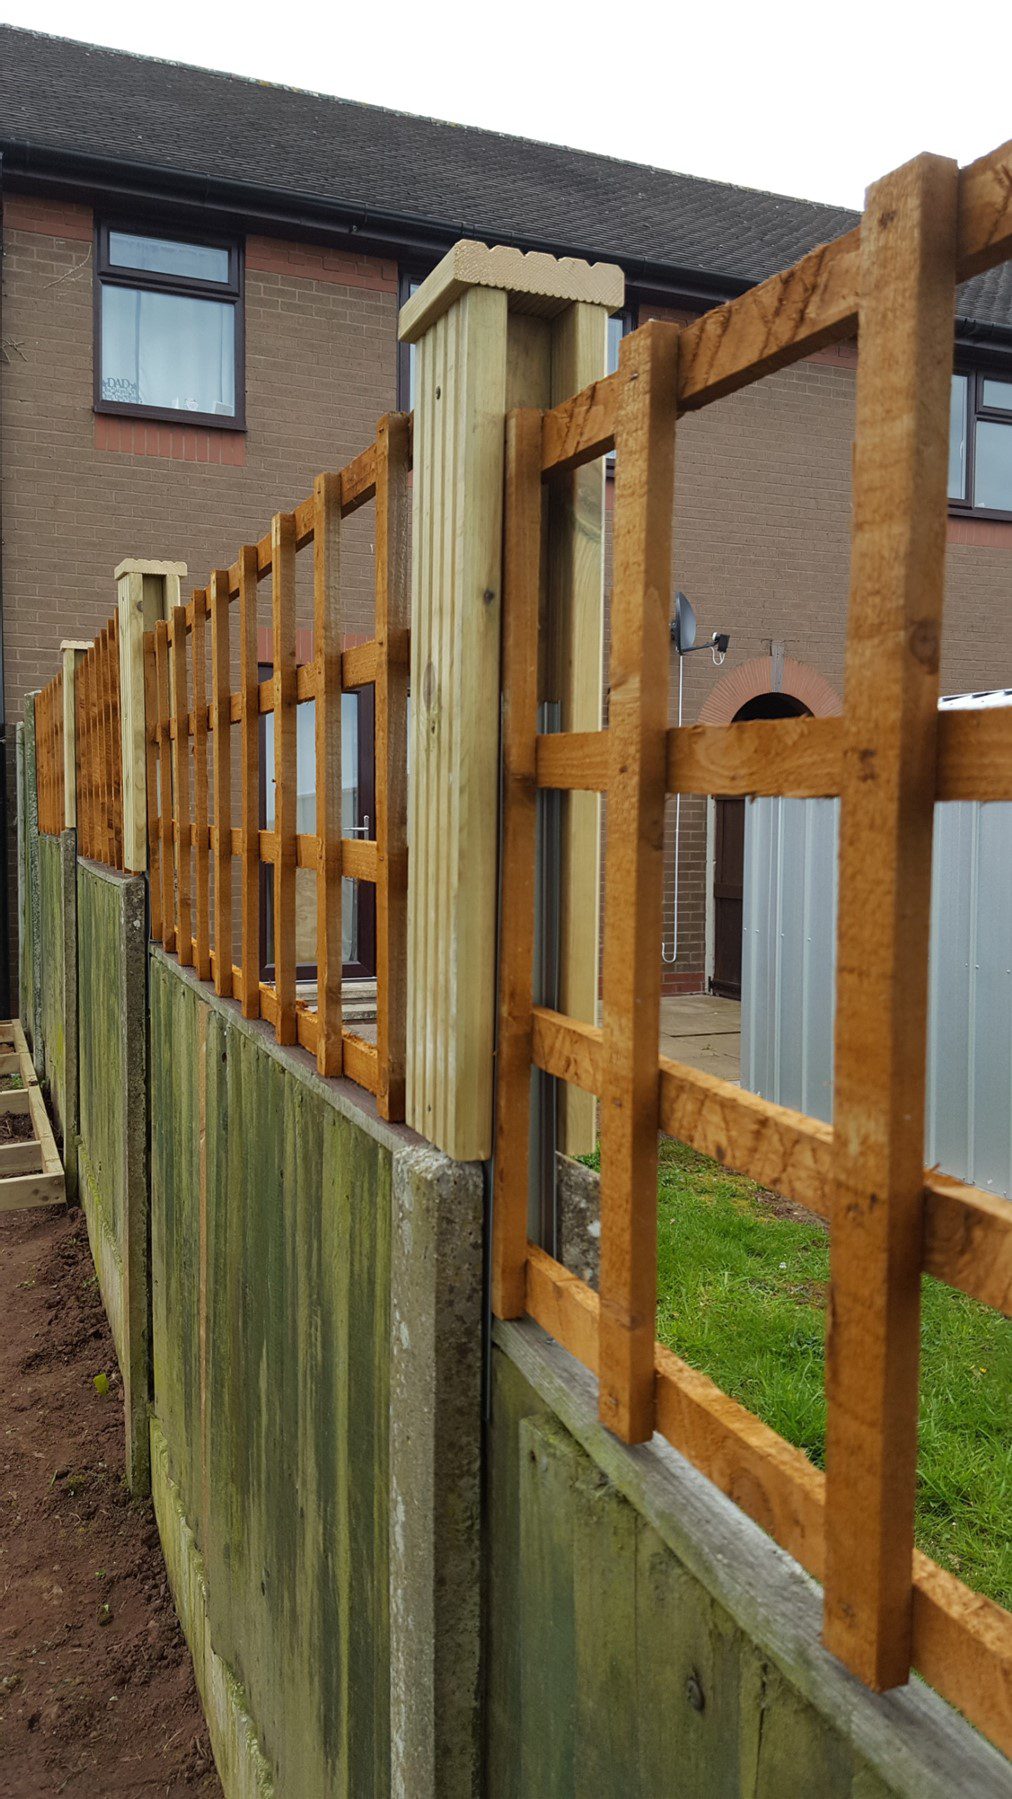
This project will allow you to extend the height of common slotted concrete garden fence posts so that you can add trellis panels above your existing fence, or replace your fence panels with taller ones, providing your garden with more security, safety and privacy. The following guide is based on the Helping Hands team’s tried and tested solution, designed to be easy and inexpensive to make and needing only a few tools.
These fence post extenders are only suitable to be fitted onto slotted concrete fence posts, so be sure to check before you get started. You should also check the maximum height of fencing which you are allowed in your area – the general rule is nothing above 6 feet is permitted. You can use the extenders to support new, taller fence panels, or add up to 60cm (2 feet) of trellis above your existing panels which is more decorative and provides somewhere to grow climbing plants.
This project is suitable for people with only a small amount of previous DIY experience. We recommend that you read the instructions below in full before starting the project.
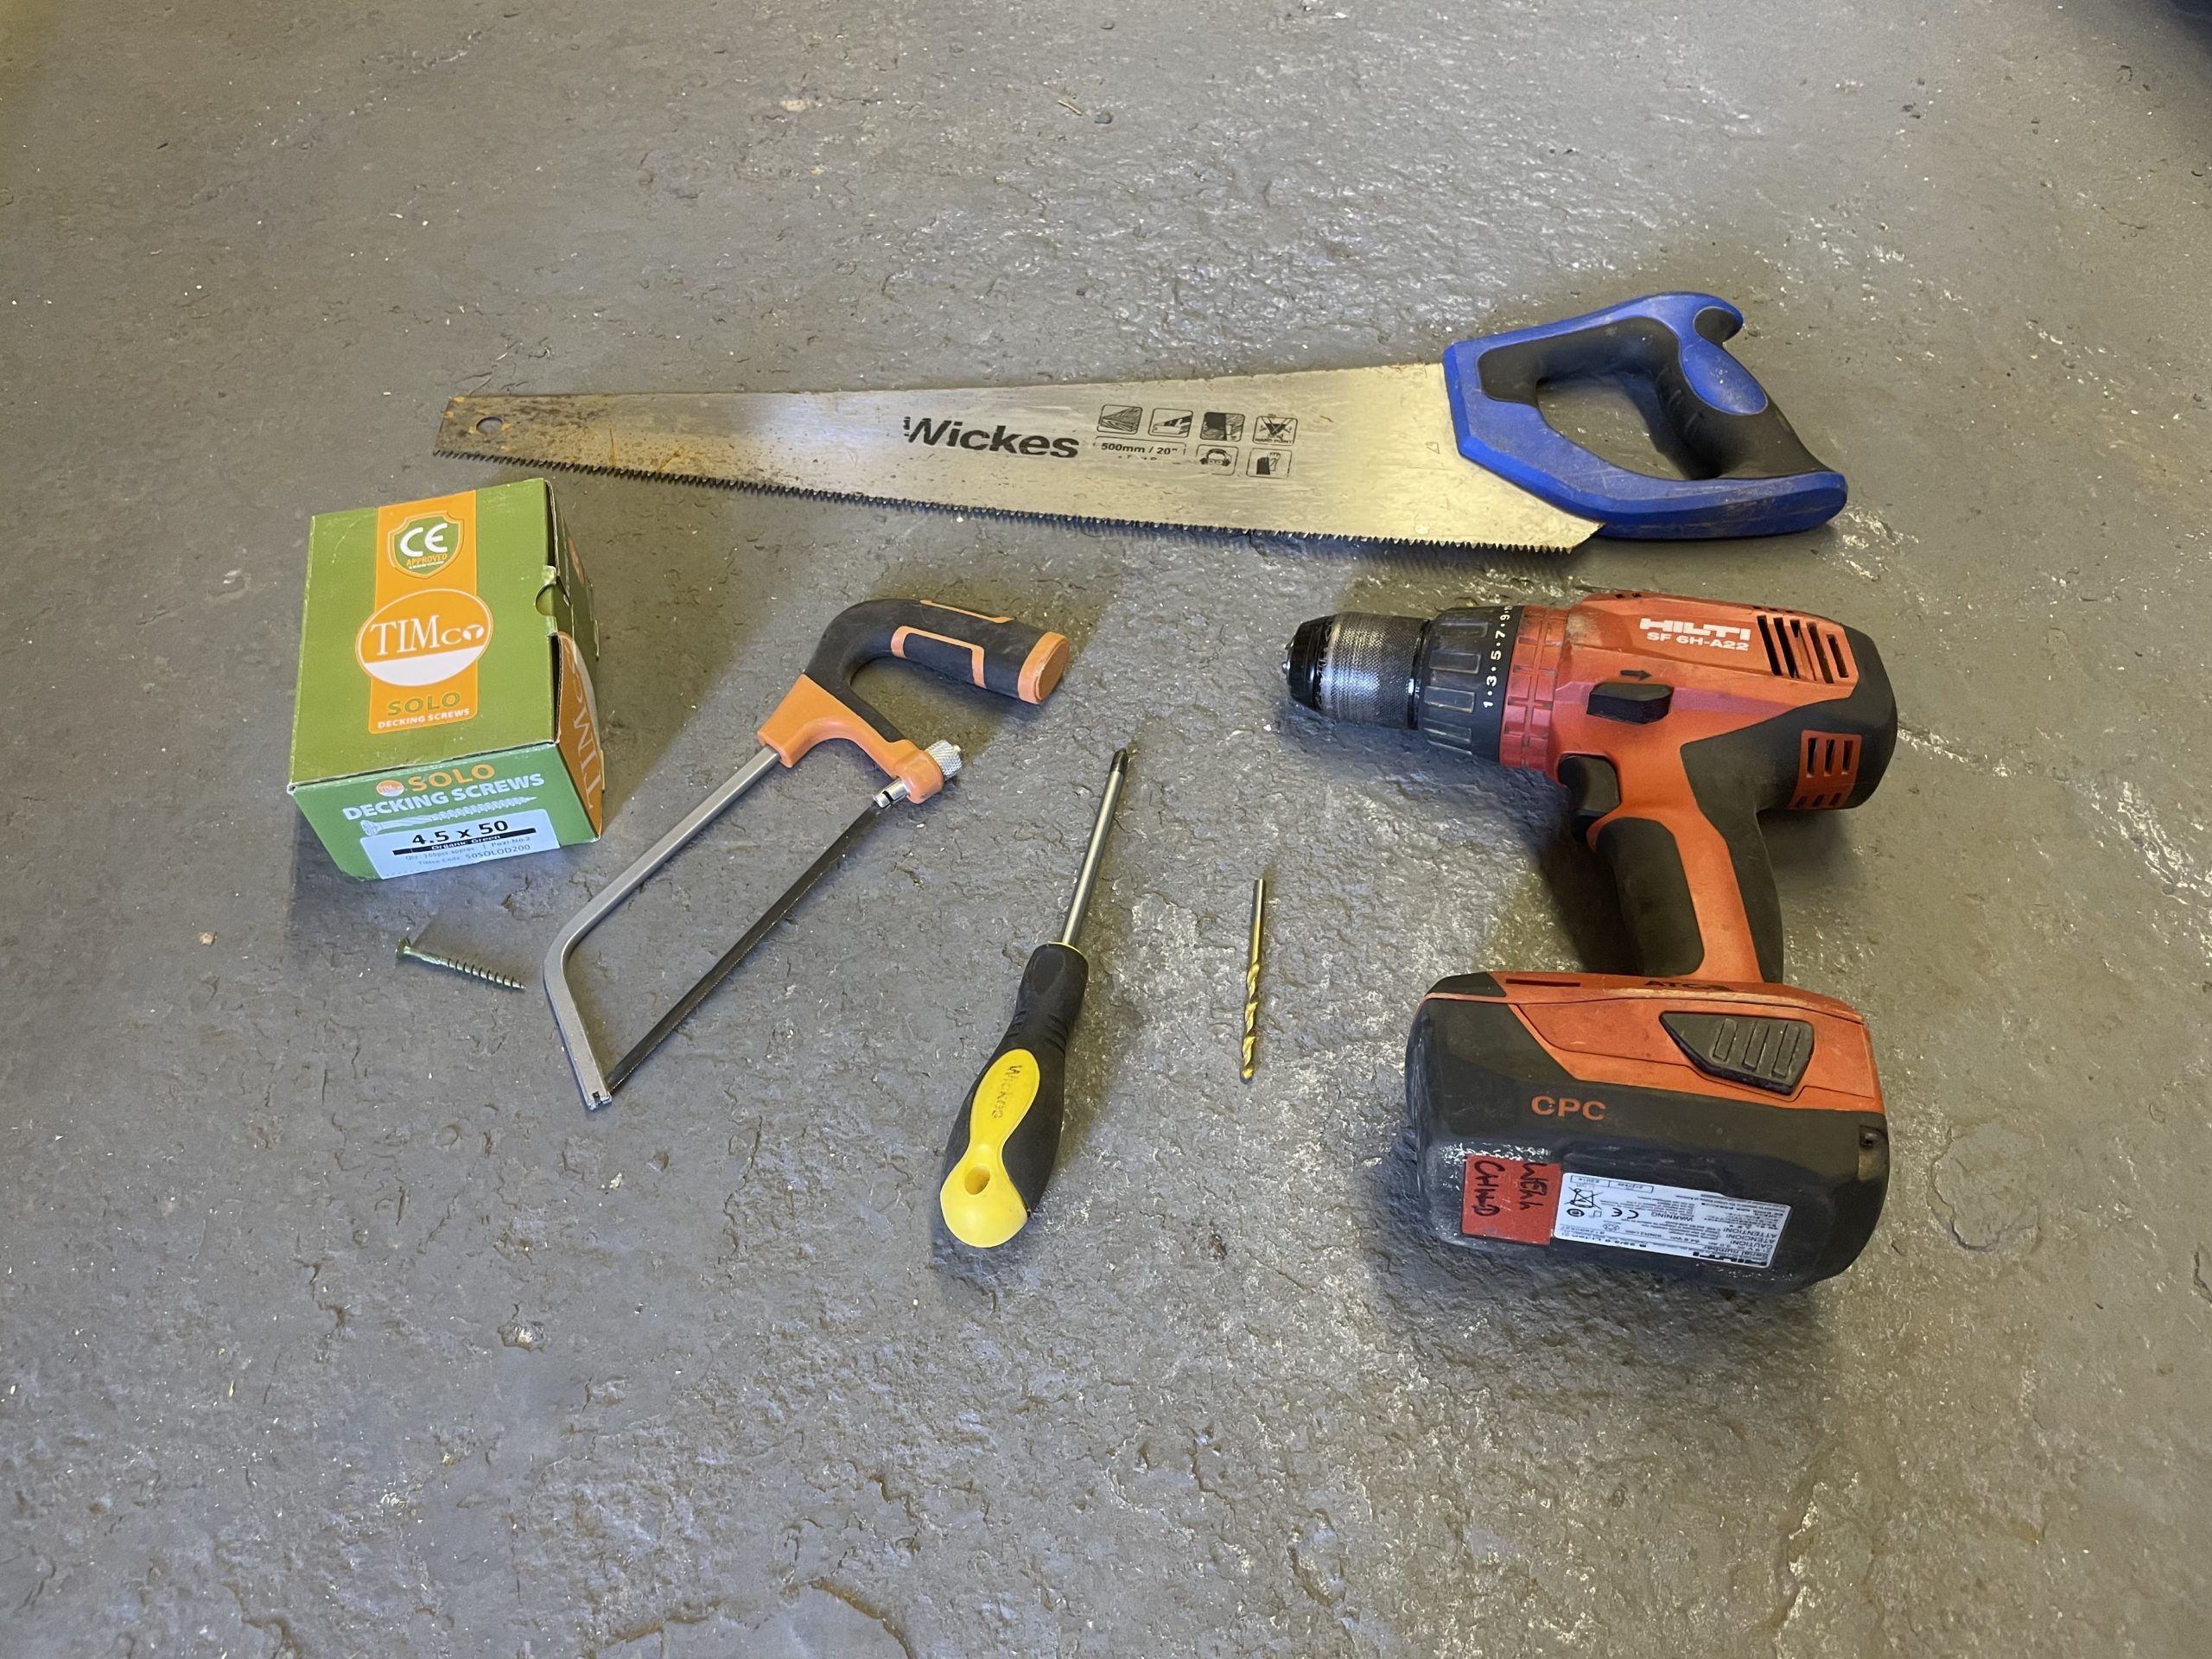
Tools needed
- Hacksaw
- Wood saw
- Screwdriver
- Tape measure
- Pencil
- Drill and suitable size HSS drill bit (capable of drilling through wood and metal) – in this case we used a 4.5mm diameter bit to match the diameter of the screws
- An area to work safely – a work bench would be useful but is not essential, just ensure you have enough space and a stable surface outside where you can carry out the drilling and sawing required safely.
Materials needed for one fence post extender
- Two lengths of decking board cut to 600mm (A)
- One length of decking board cut to 130mm (B)*
- One length of treated external 50 x 47mm (2” x 2”) timber cut to 600mm (C)
- Two lengths of galvanised metal U channel (52mm x 25mm x 0.55mm) cut to 600mm lengths (D)
- A small box of 50mm decking screws.
All of these materials should be available from your local builder’s merchant. Remember that you will need to make as many fence post extenders as you have fence posts in your garden, so calculate the total amount of materials you need before you get started
*This piece will form the top of the post extender so the measurement may vary depending on the width of the decking board you are using – please see the pictures in Step 9 below which show how these pieces will fit together.
Construction
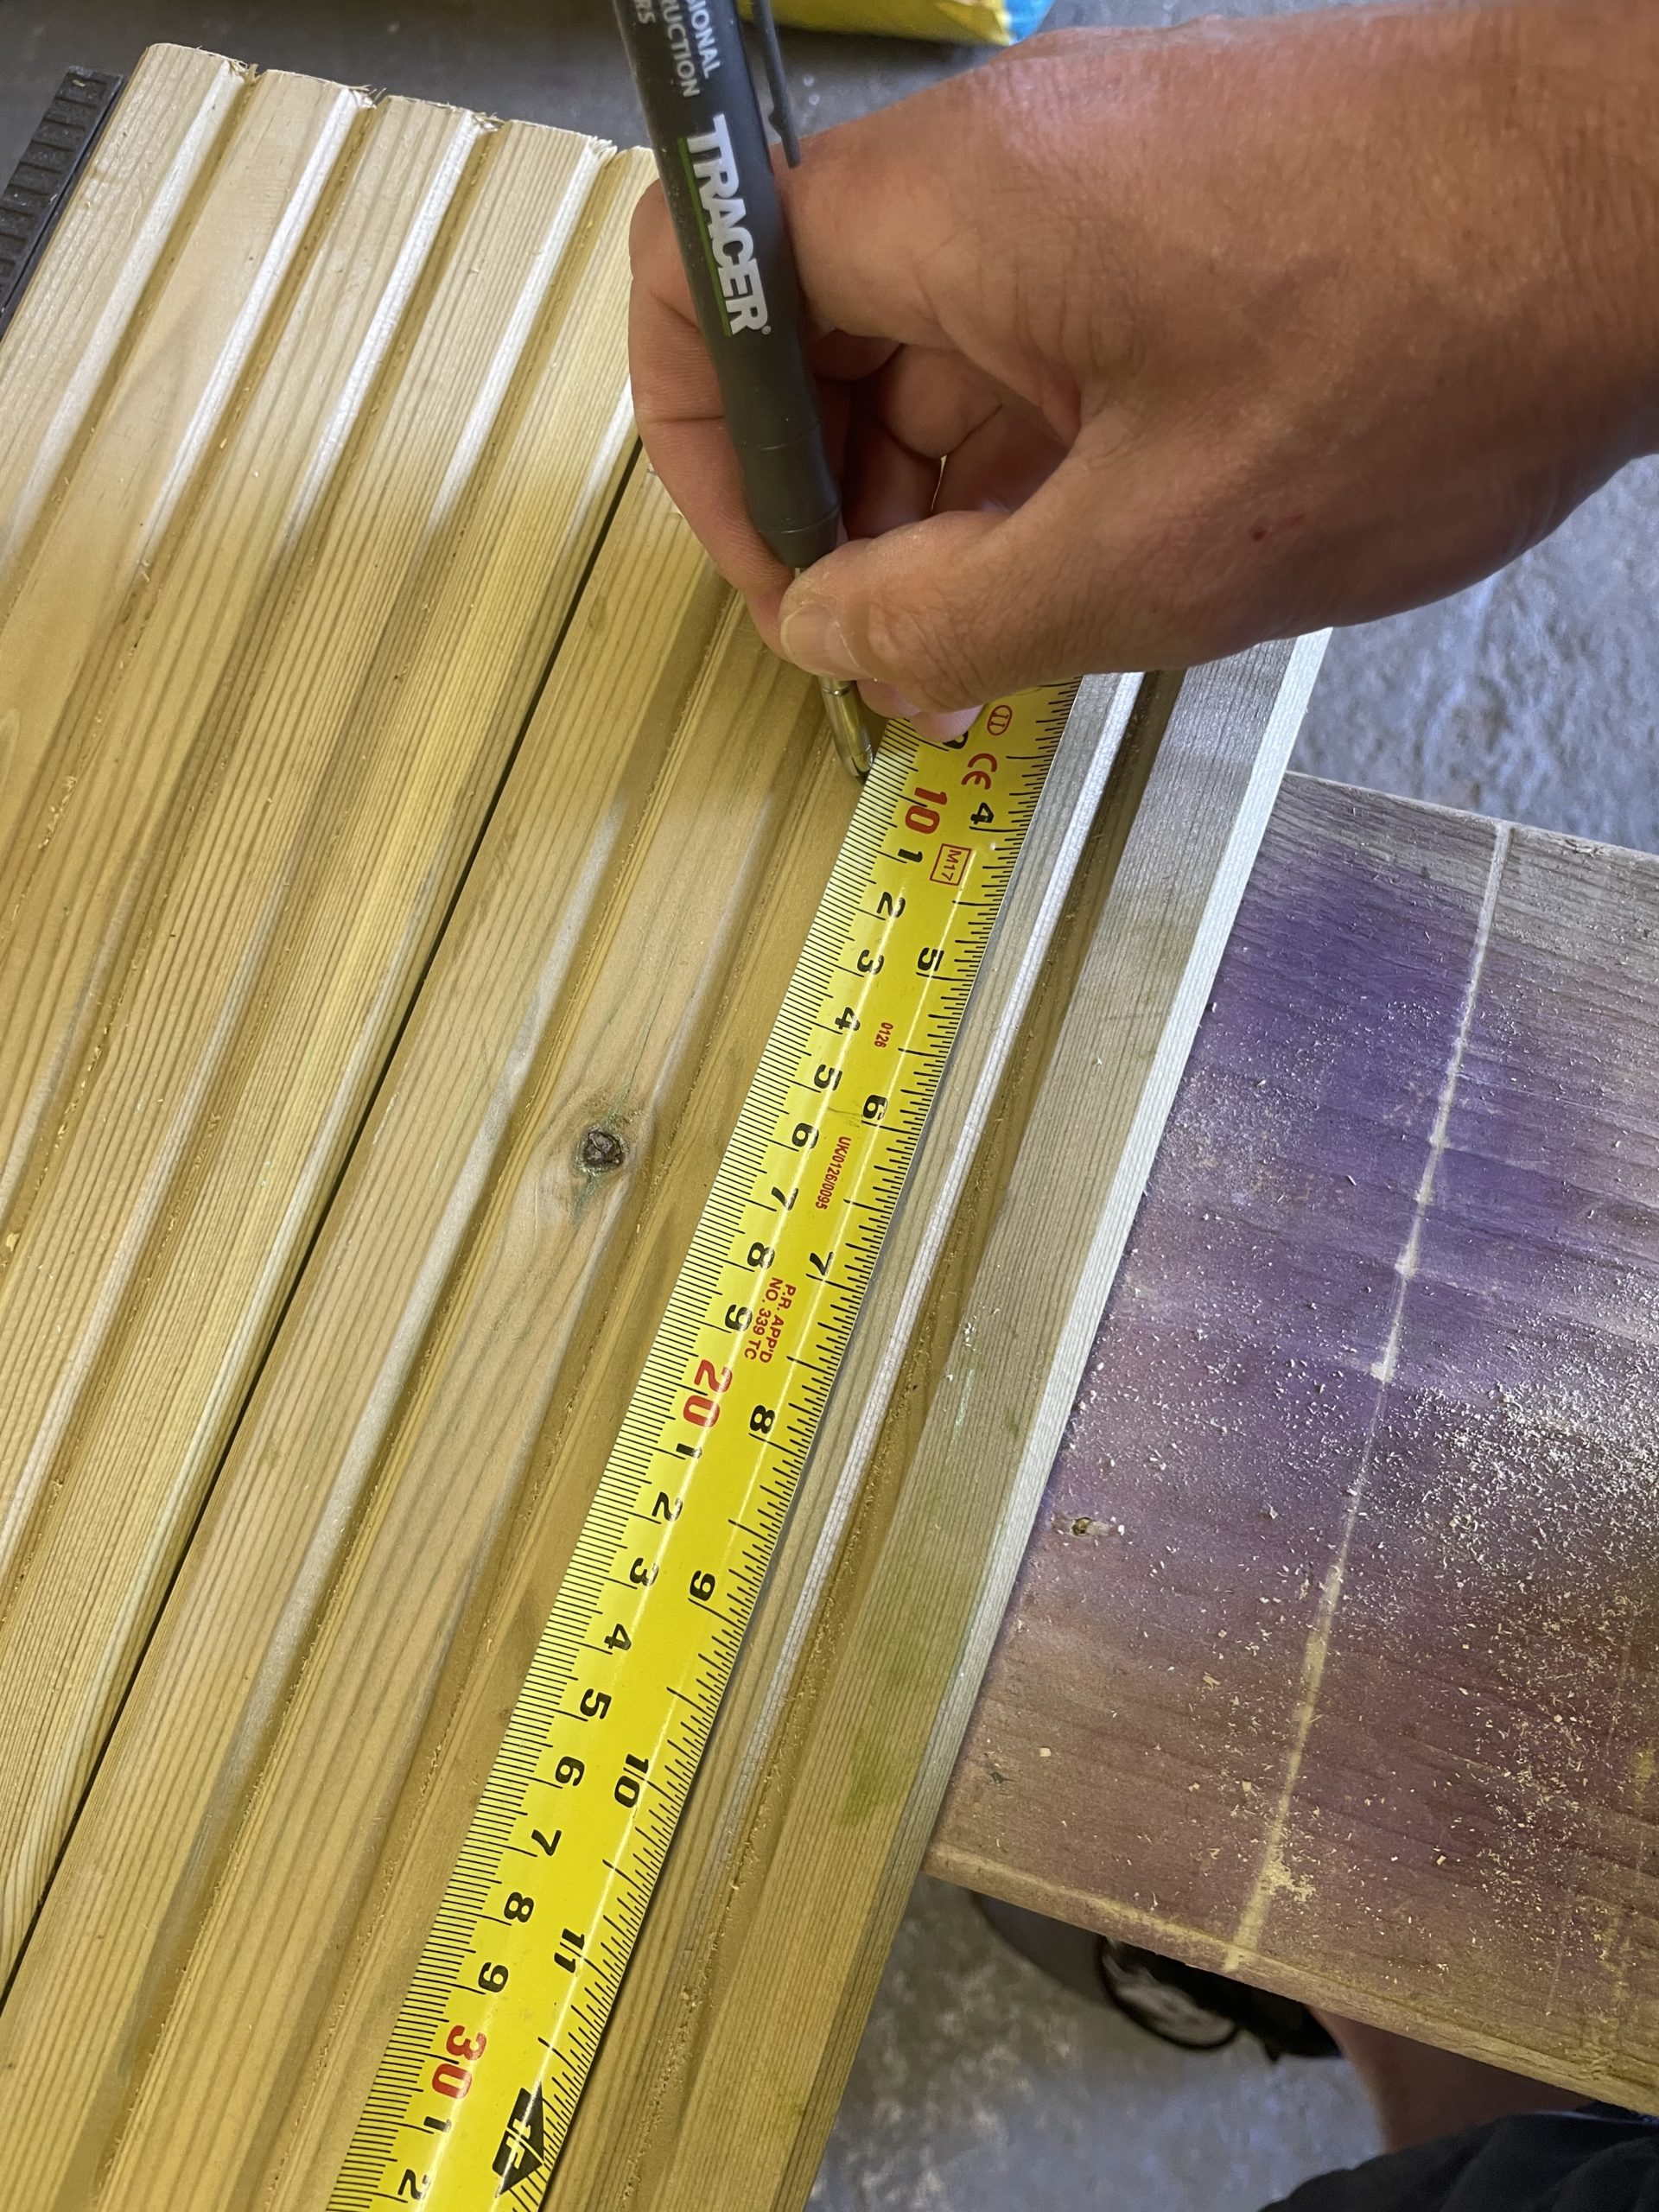
- Mark three evenly spaced points down the centre of each of the two 600mm decking boards (A). Use a measuring tape as pictured and make a note of the length at which each mark you make is (for example, at 100mm, 300mm and 500mm). Ensure that each mark is over 50mm from the end of the boards to prevent splitting when you drill these holes.
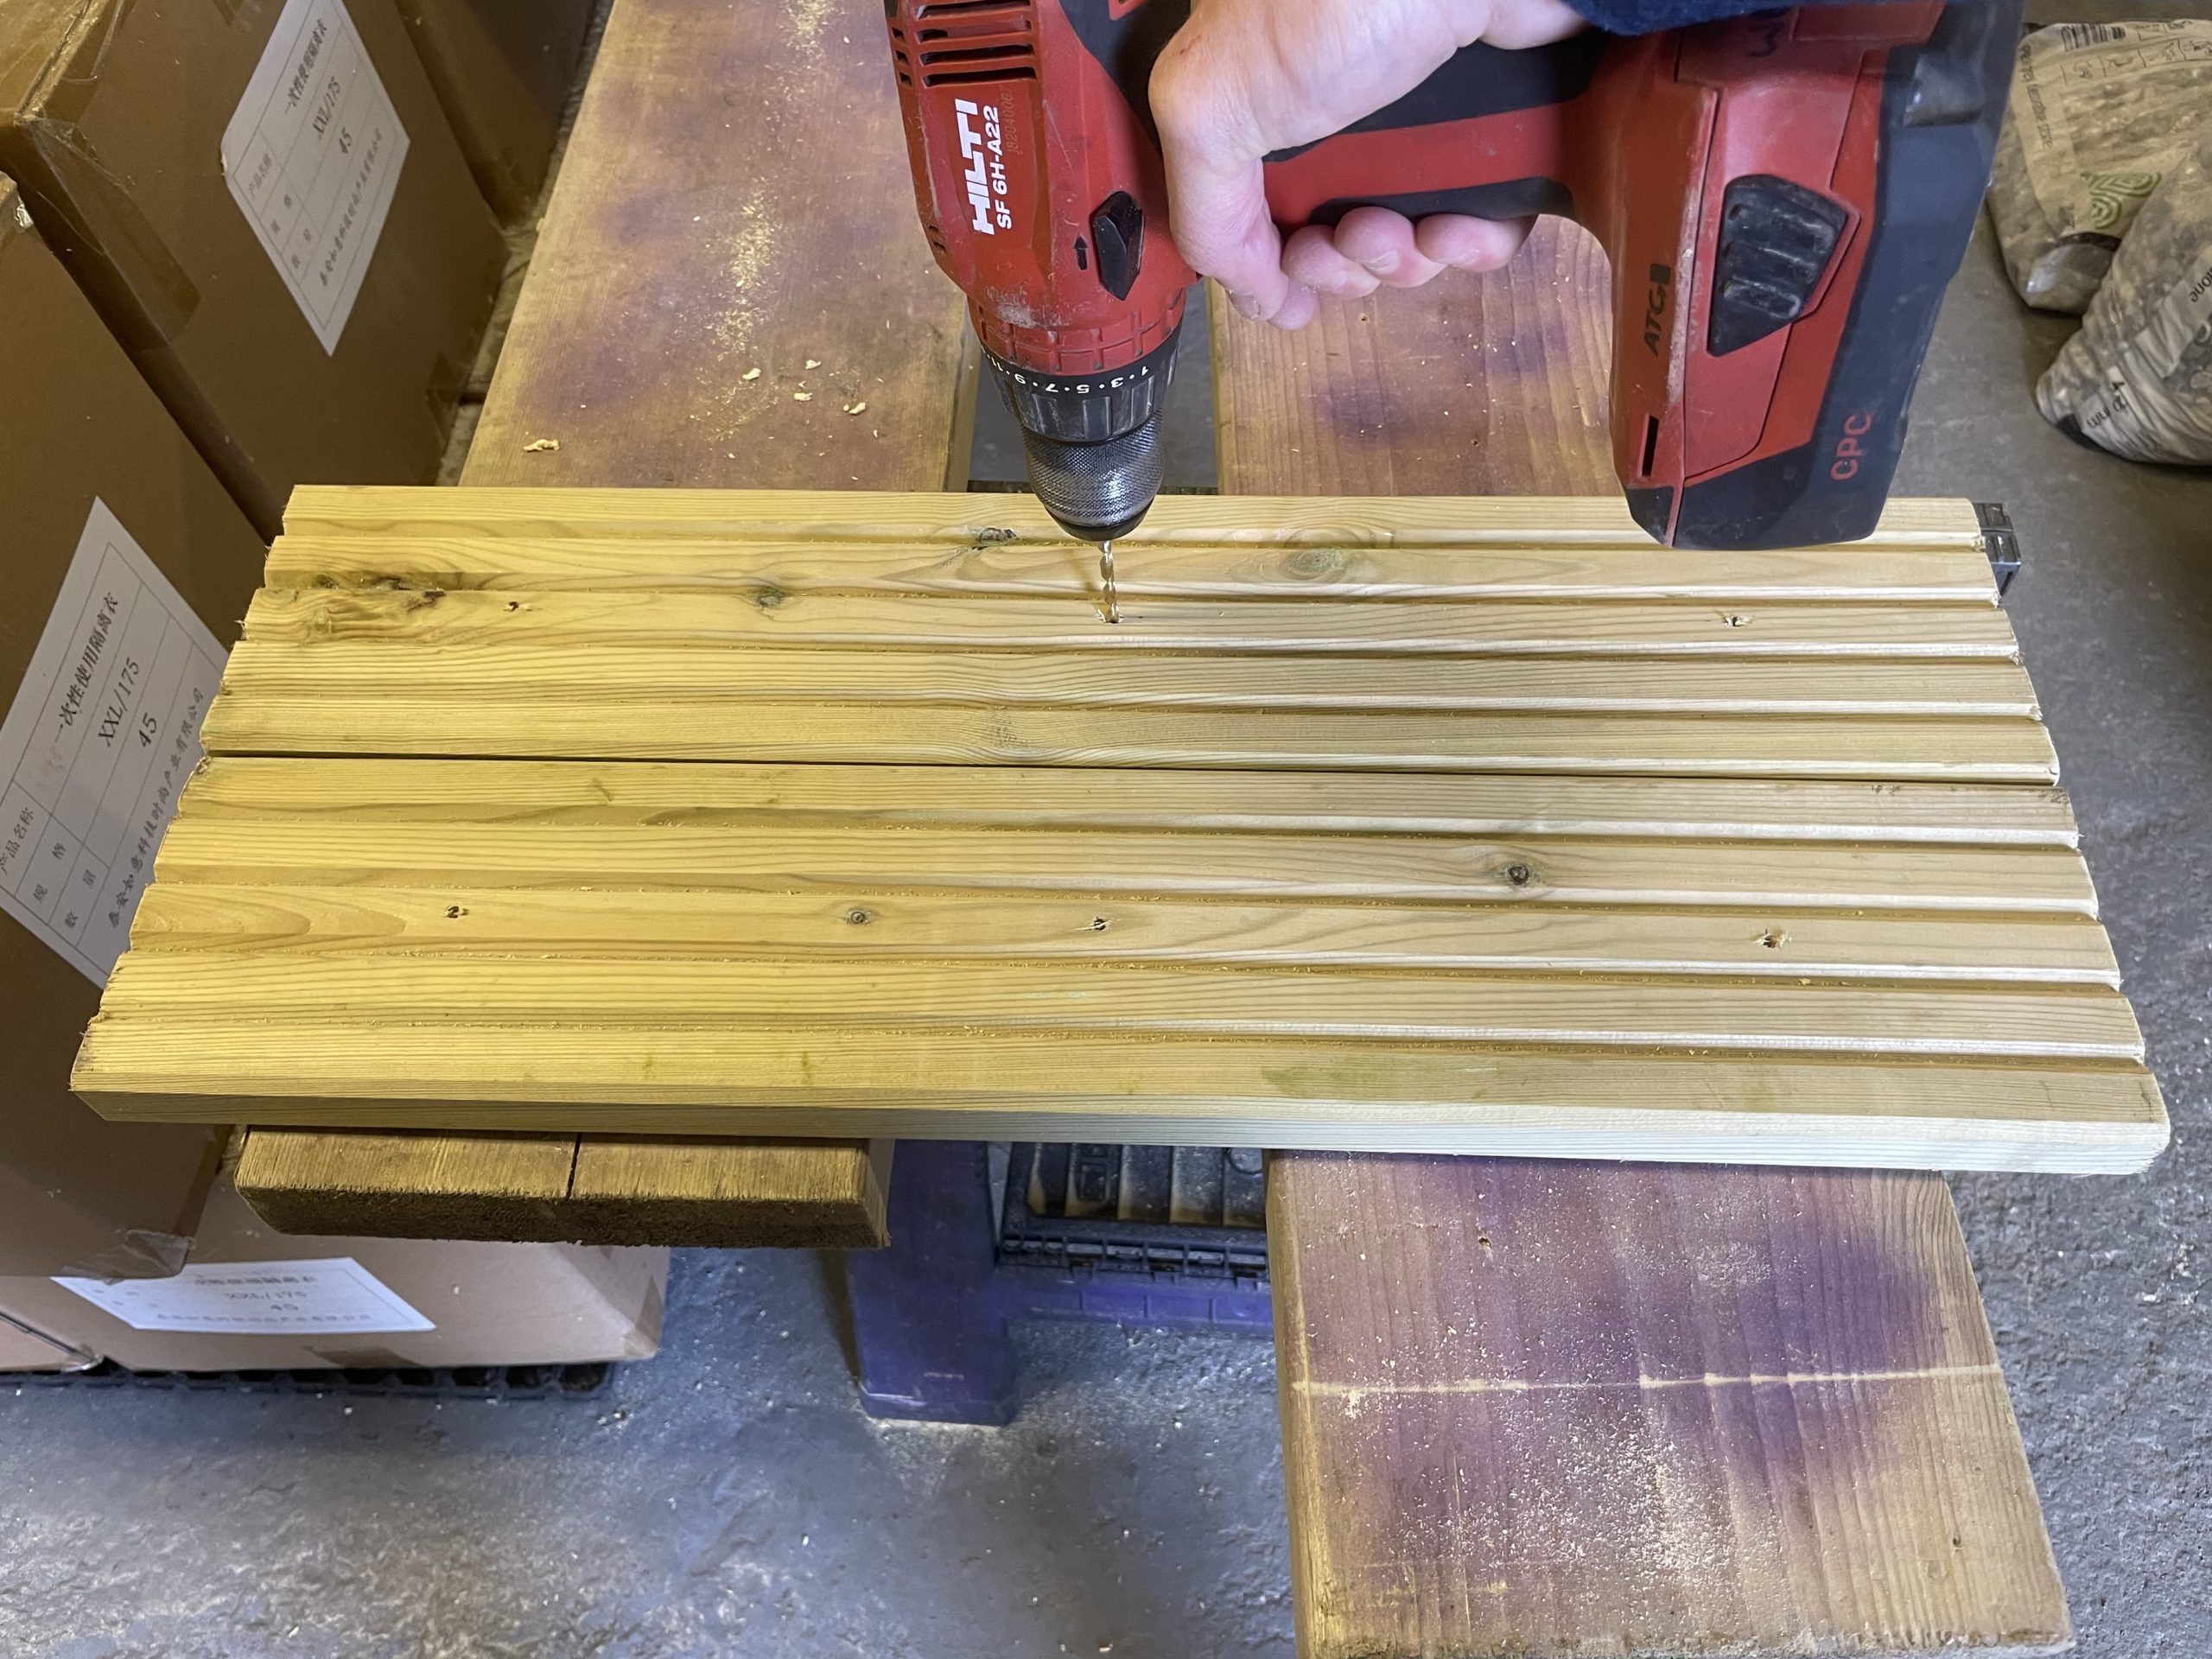
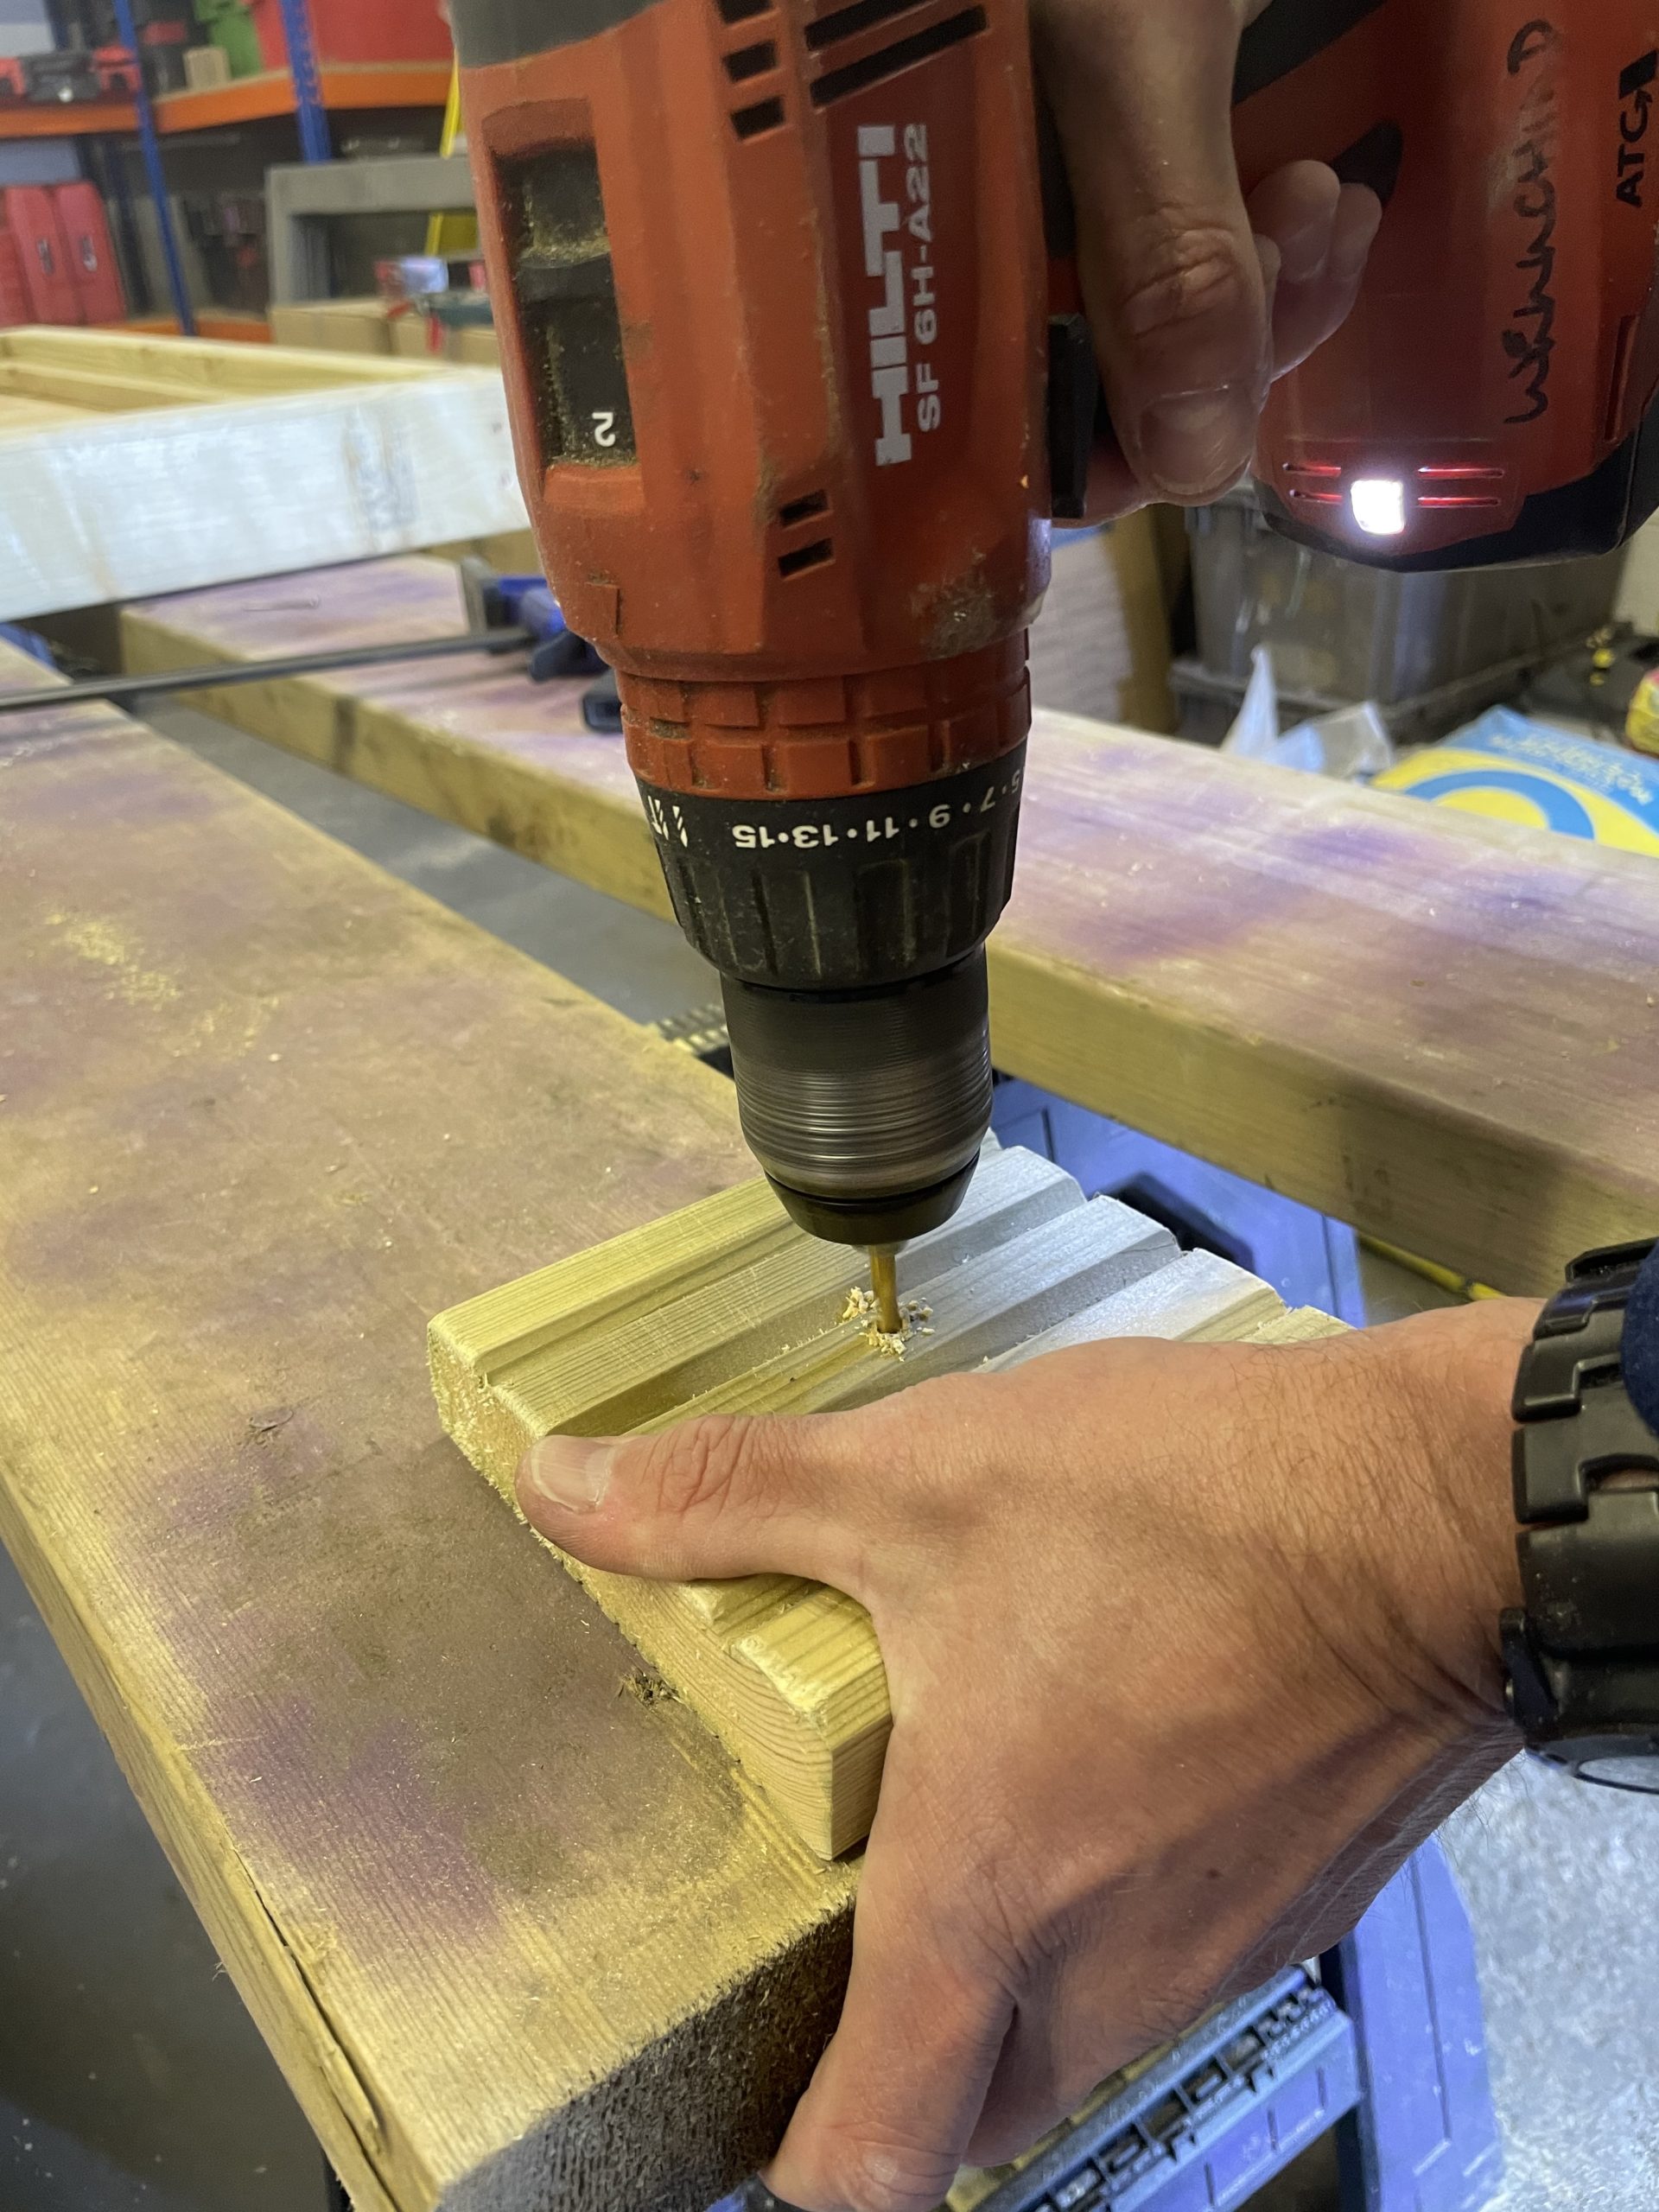
2. Drill down the centre of the two 600mm decking boards (A) at three evenly spaced points you marked in step 2.
3. Drill a hole in the centre of the small, 130mm length of decking board (B)
4. You should now have the 600mm length of treated external timber (C), two predrilled 600mm decking boards (A), and a predrilled 130mm decking board (B).

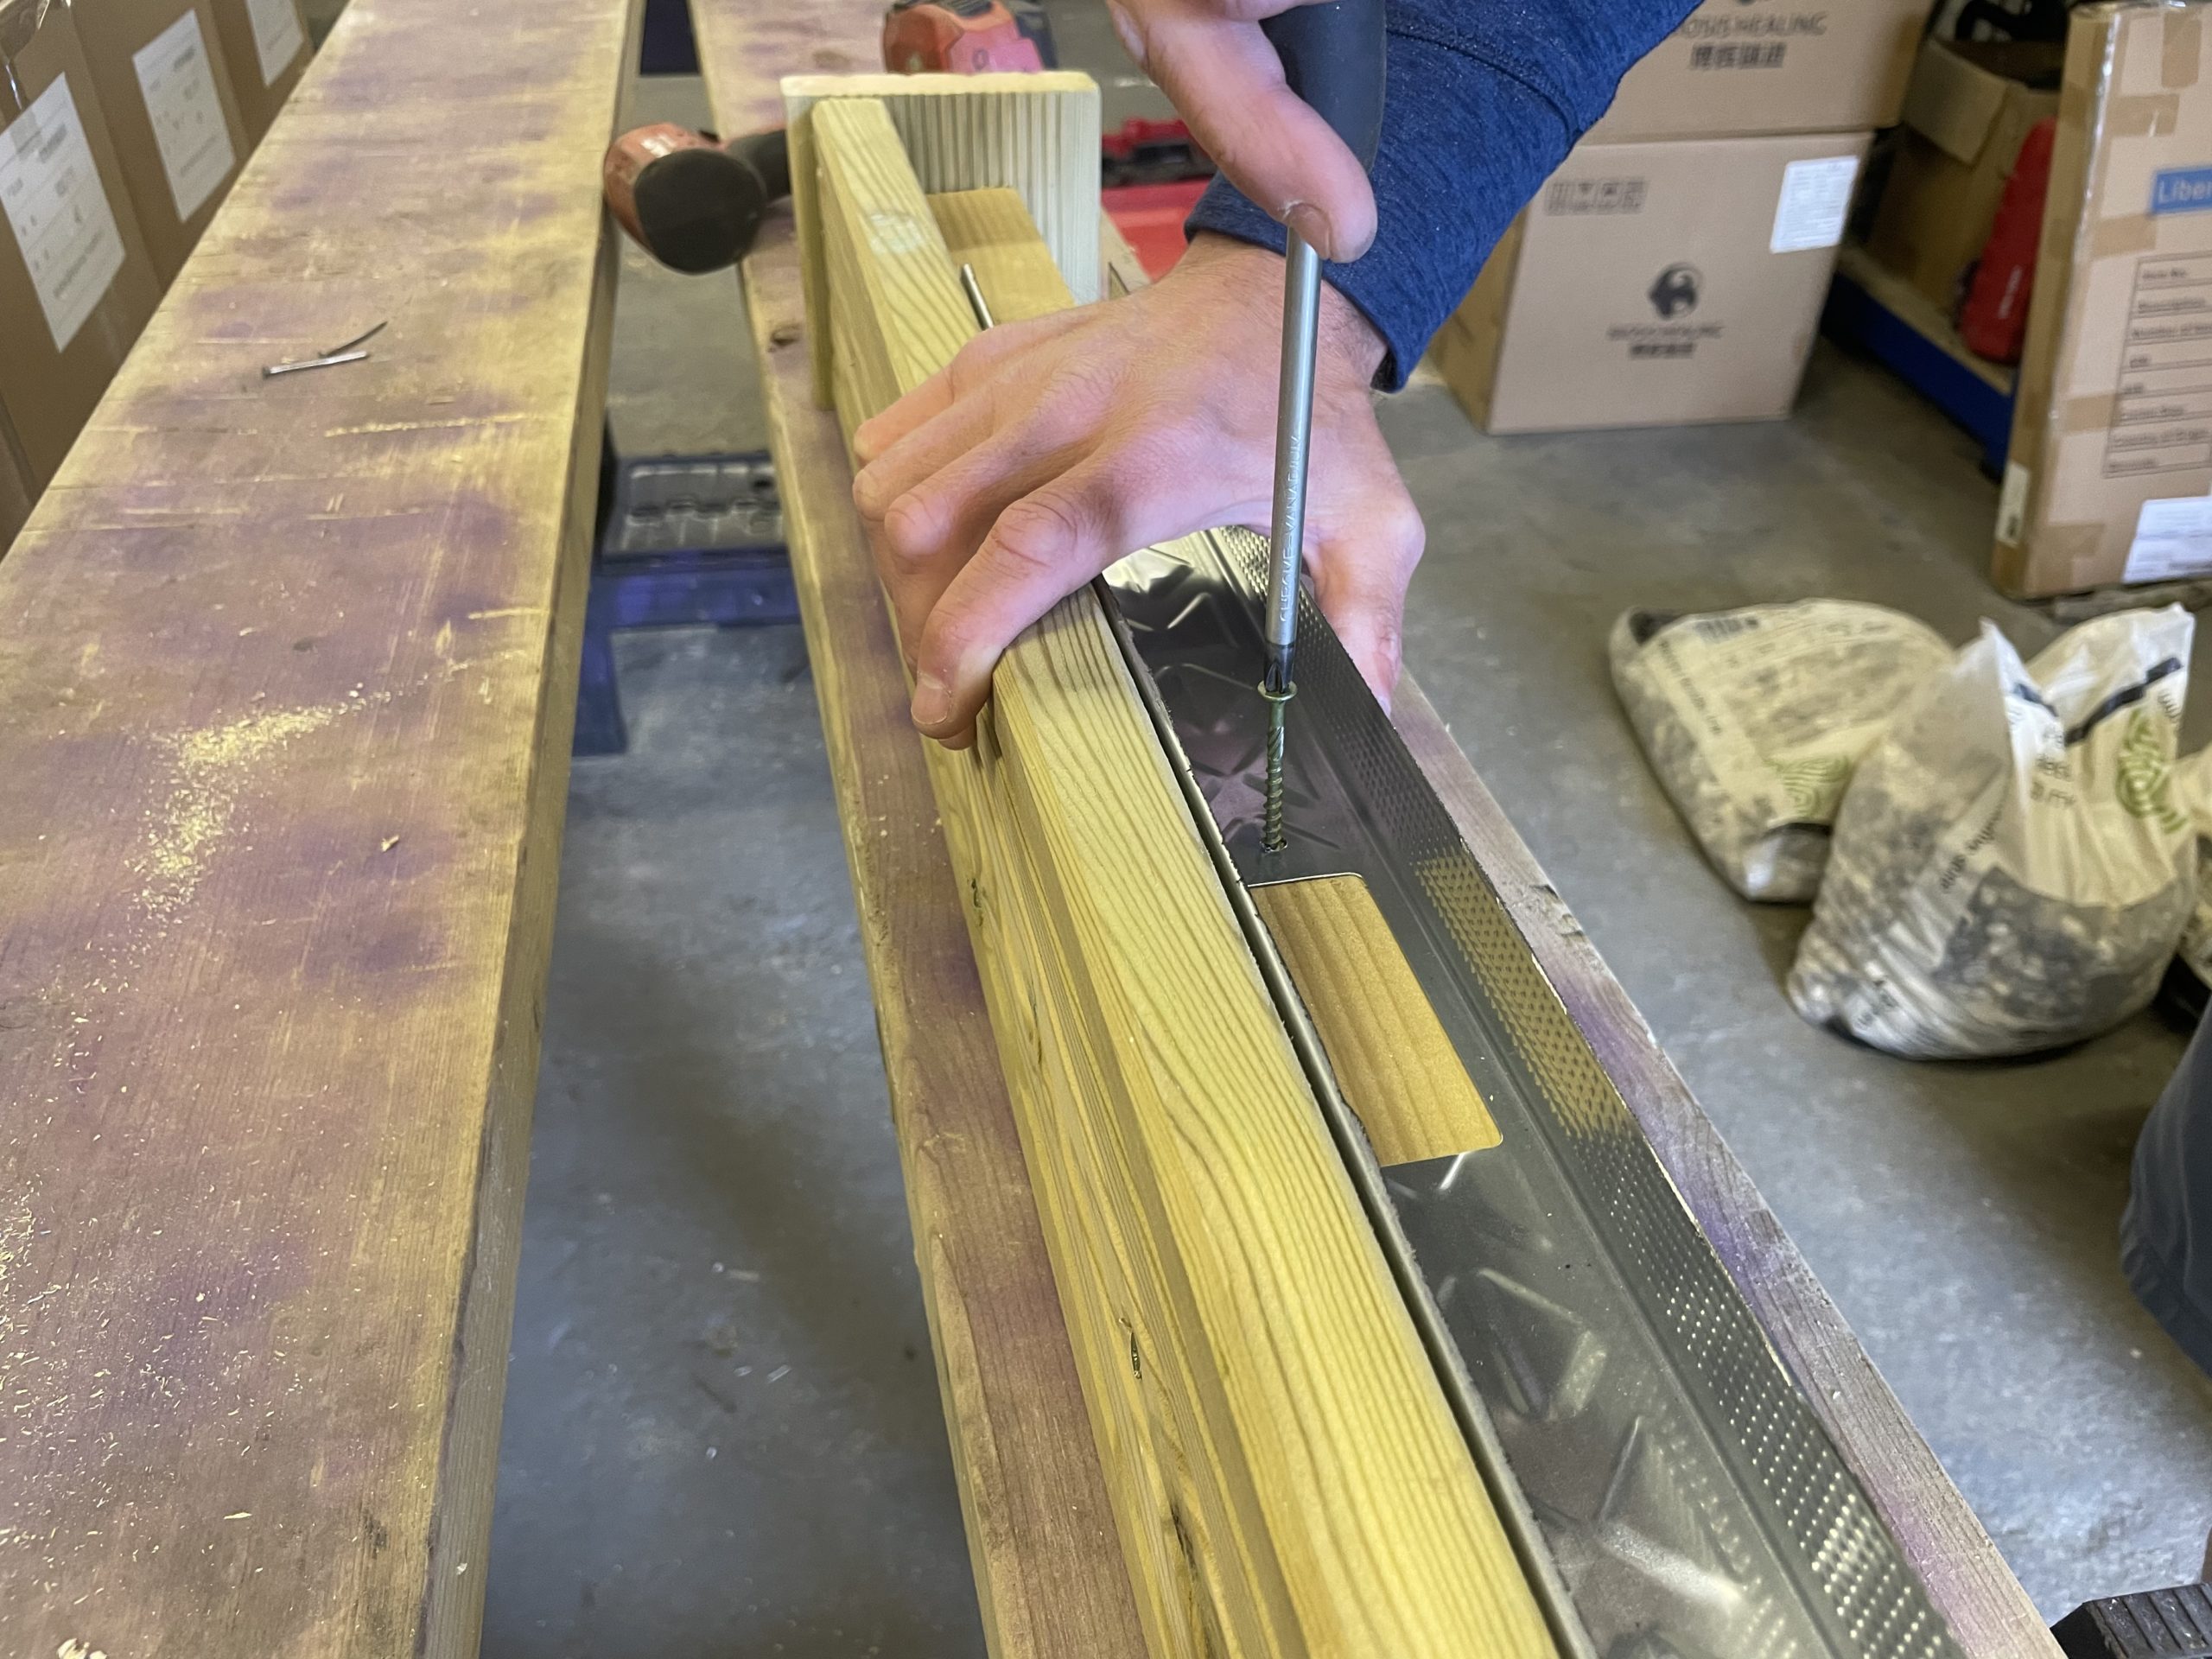
5. Lay the 600mm length of treated external timber (C) down the centre of one of the deck boards (A) and screw into place, through the predrilled holes in the decking board (A) and into the treated timber (C) to create a piece the same as the below picture.
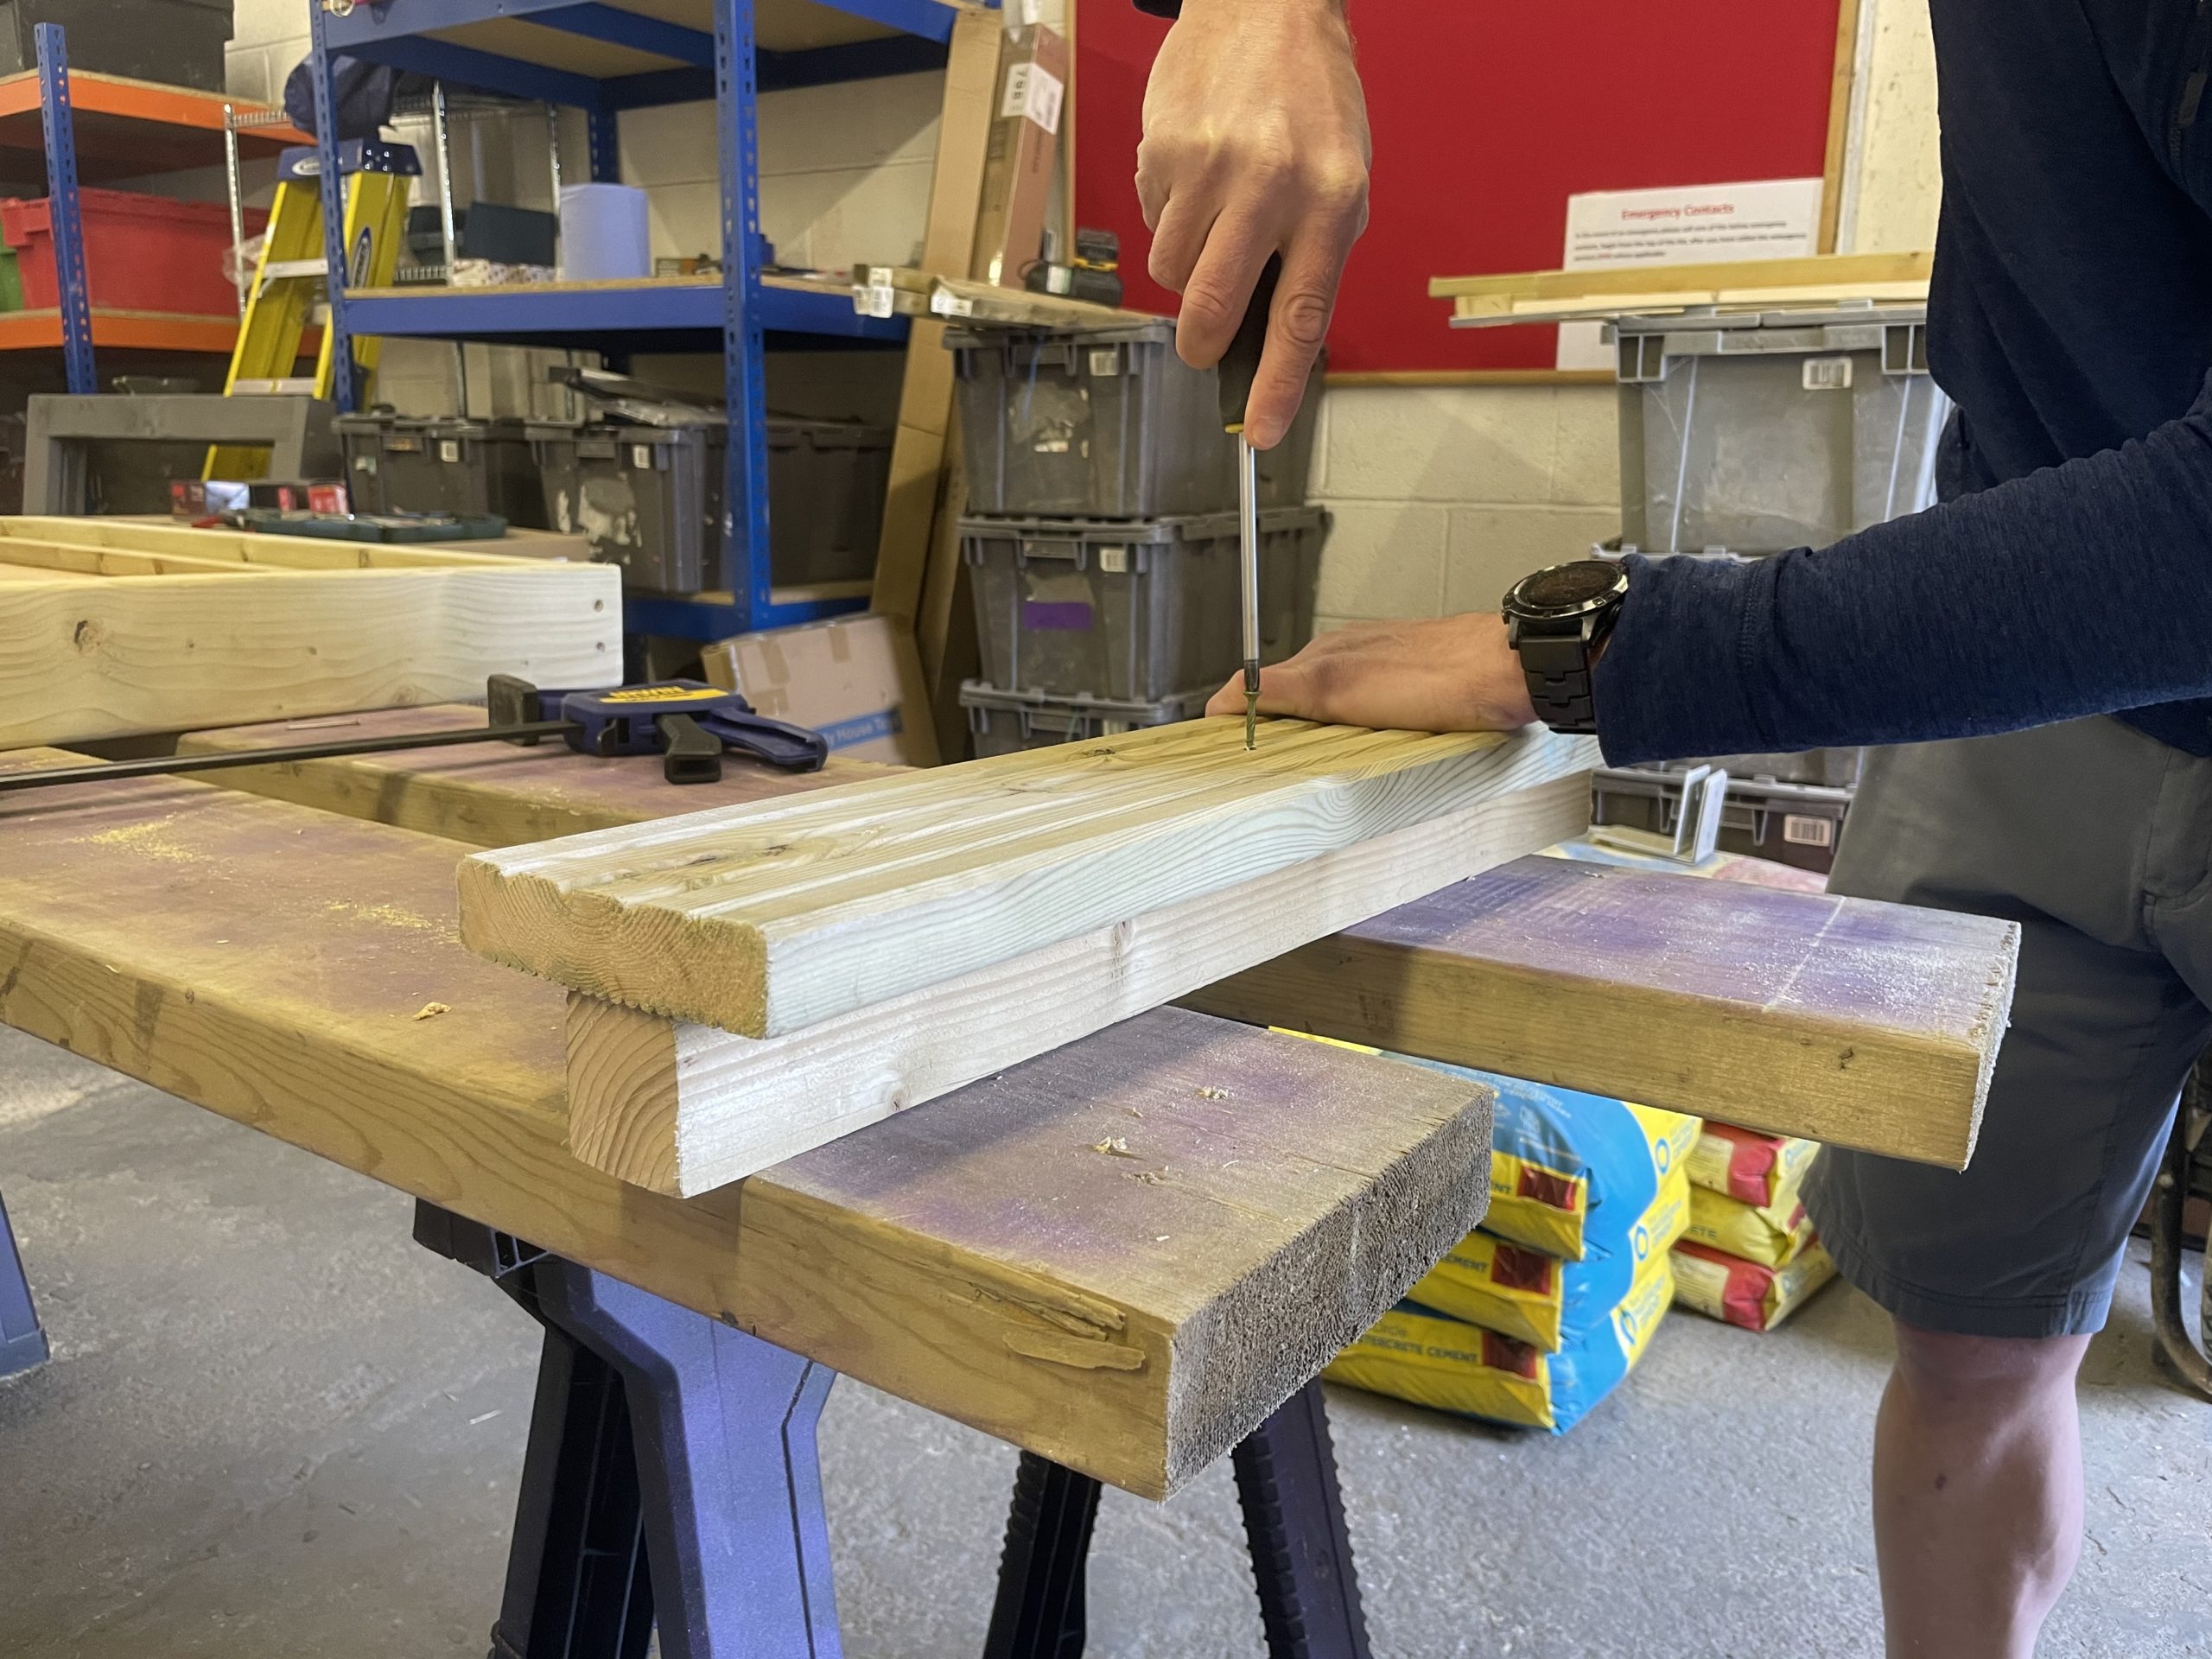
6. Screw the 130mm length of decking board (B) to the end of the treated piece made in step 5.

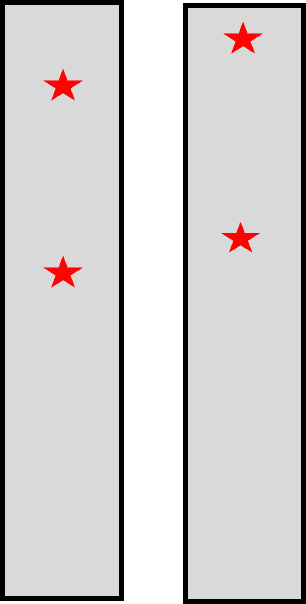
7. Mark the top of each 300mm of the U Channel (D) for drilling in two places, ensuring that you offset the holes in each channel. This will ensure the screws do not conflict with each other when you are fixing them in place. Use a measuring tape to make sure the holes are offset as in the diagram below.

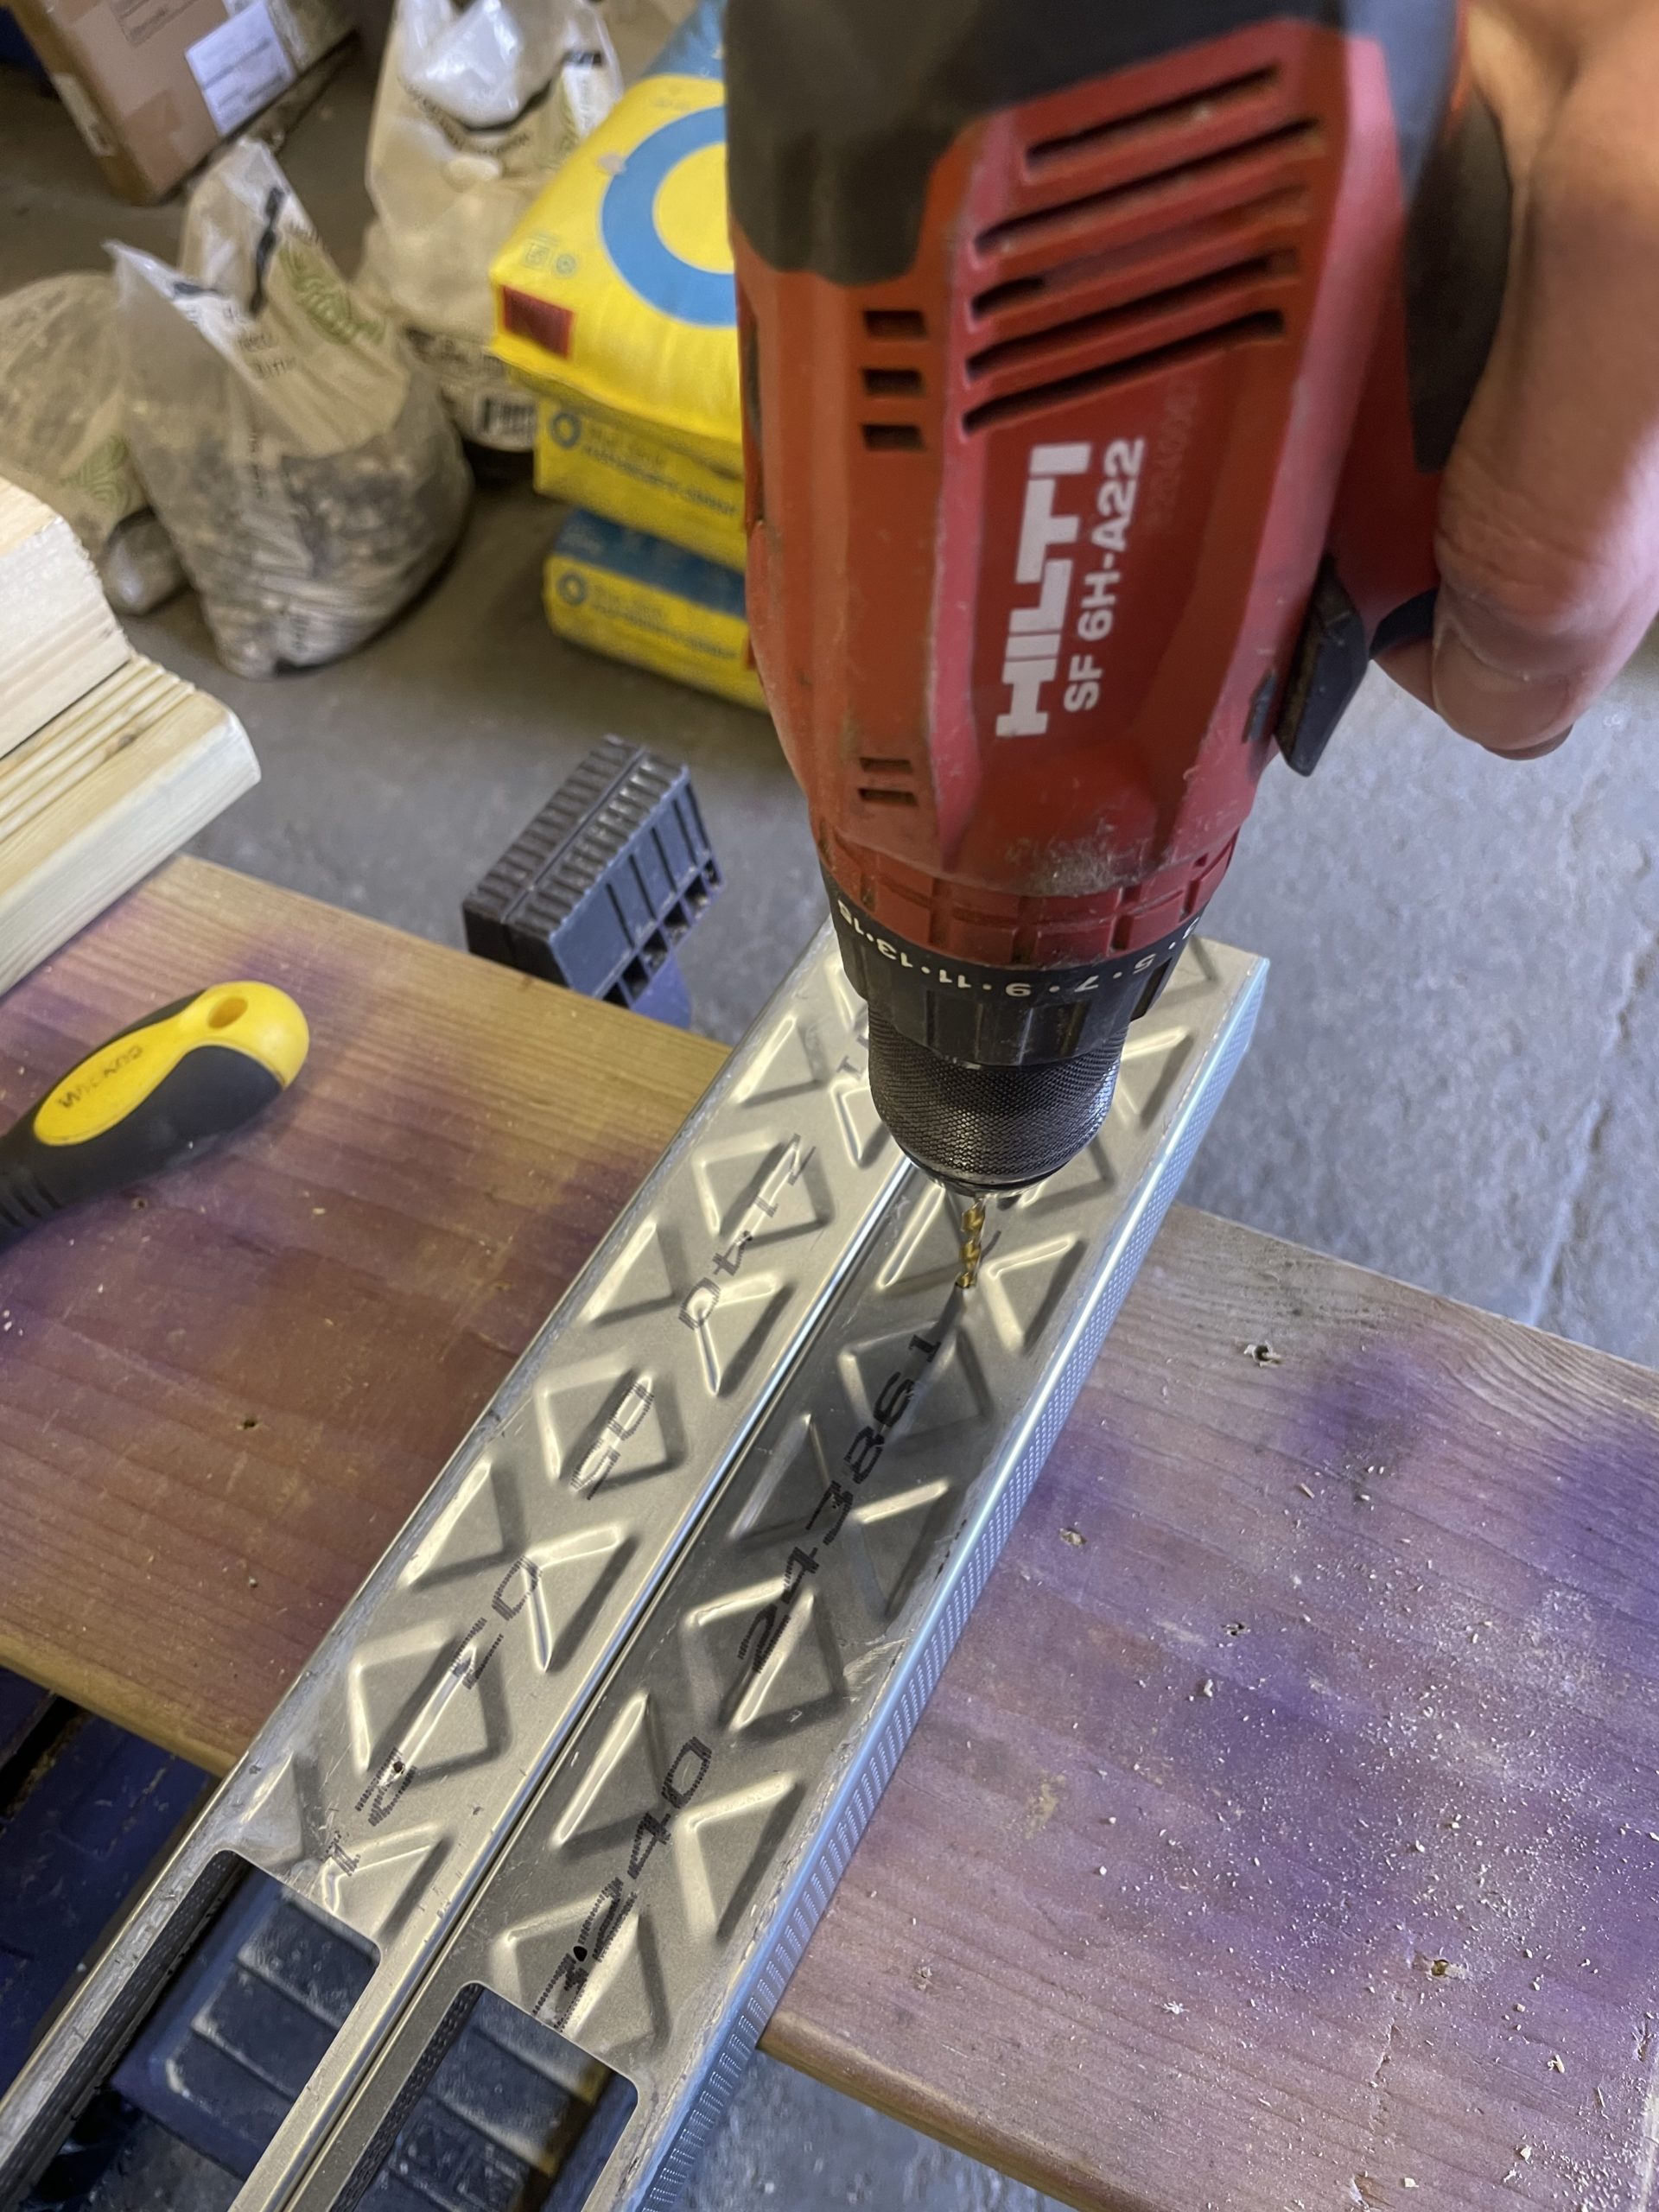
8. Drill both U channel (D) pieces in the places you marked in step 7.
9. Lay a U channel (D) onto the treated timber. Ensure that 300mm of the U channel (D) is protruding from the timber structure. Fix in place with two screws through the U channel and into the treated timber. Repeat this step with the second U channel (D) on the opposite side.
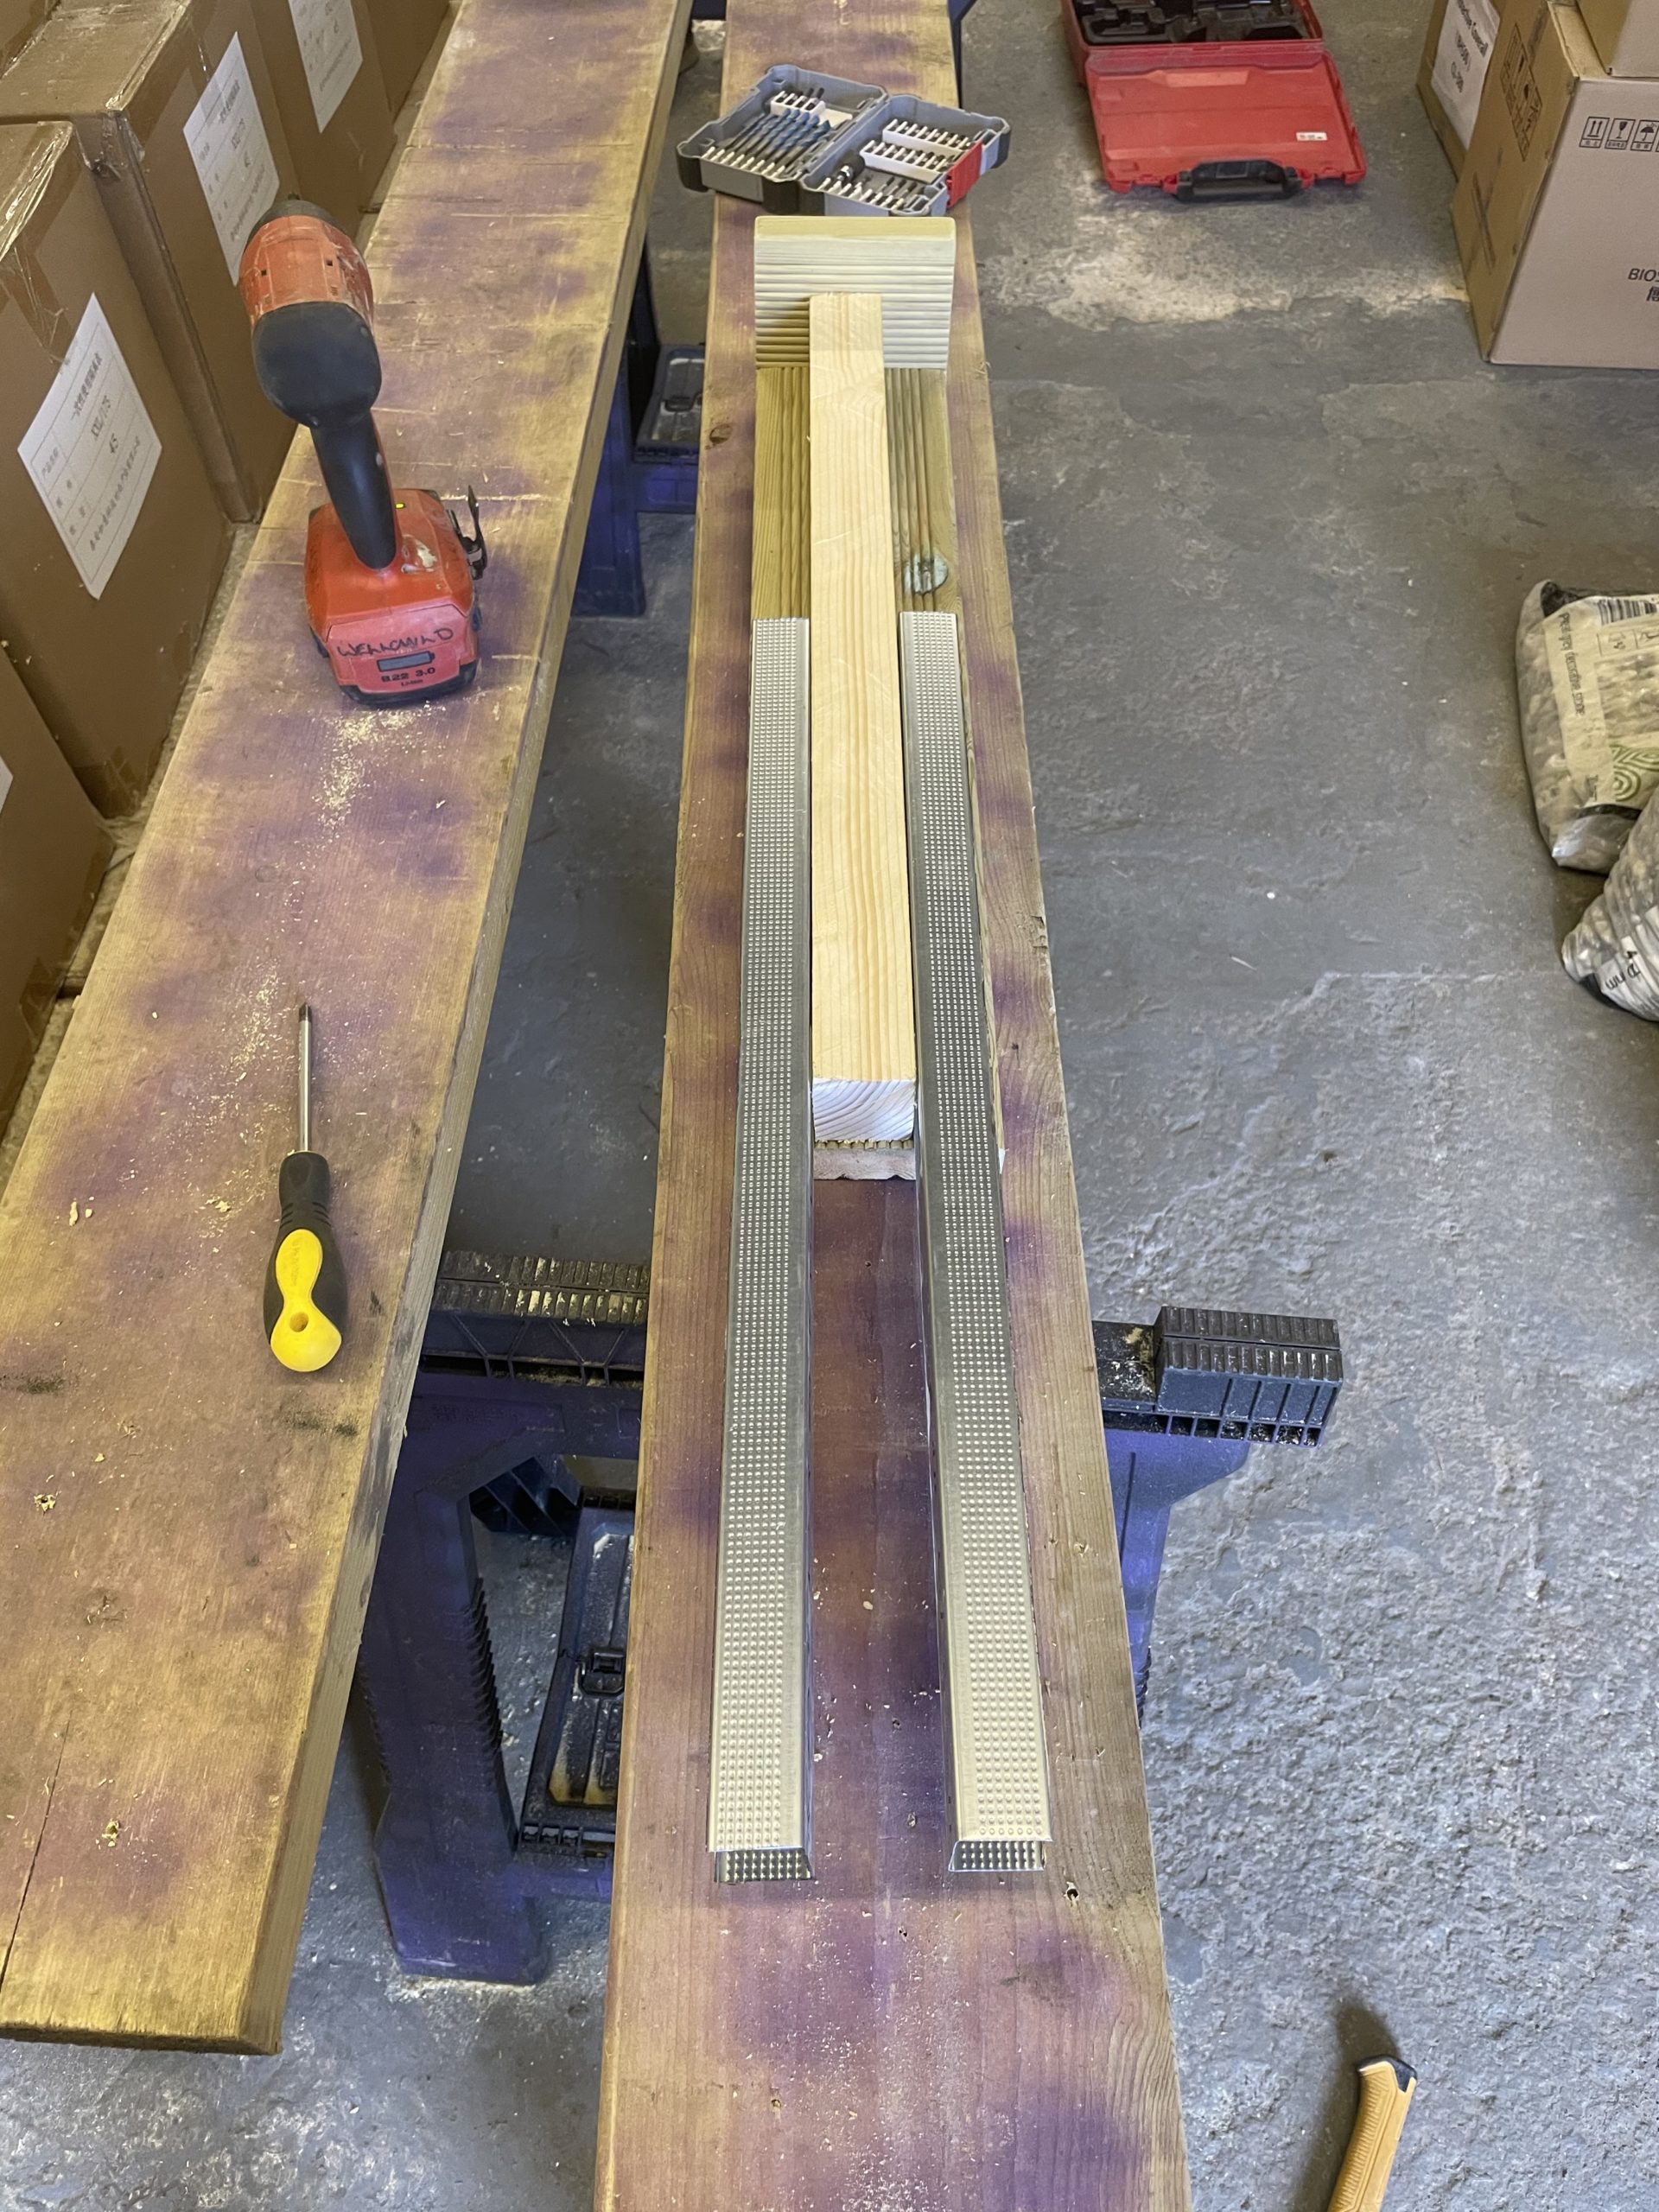
10. Lay the last piece of decking timber (A) on to the open side and screw into place to create a ‘H’ shape with the U channel (D) sandwiched in the bottom 300mm and protruding 300mm (see image below).
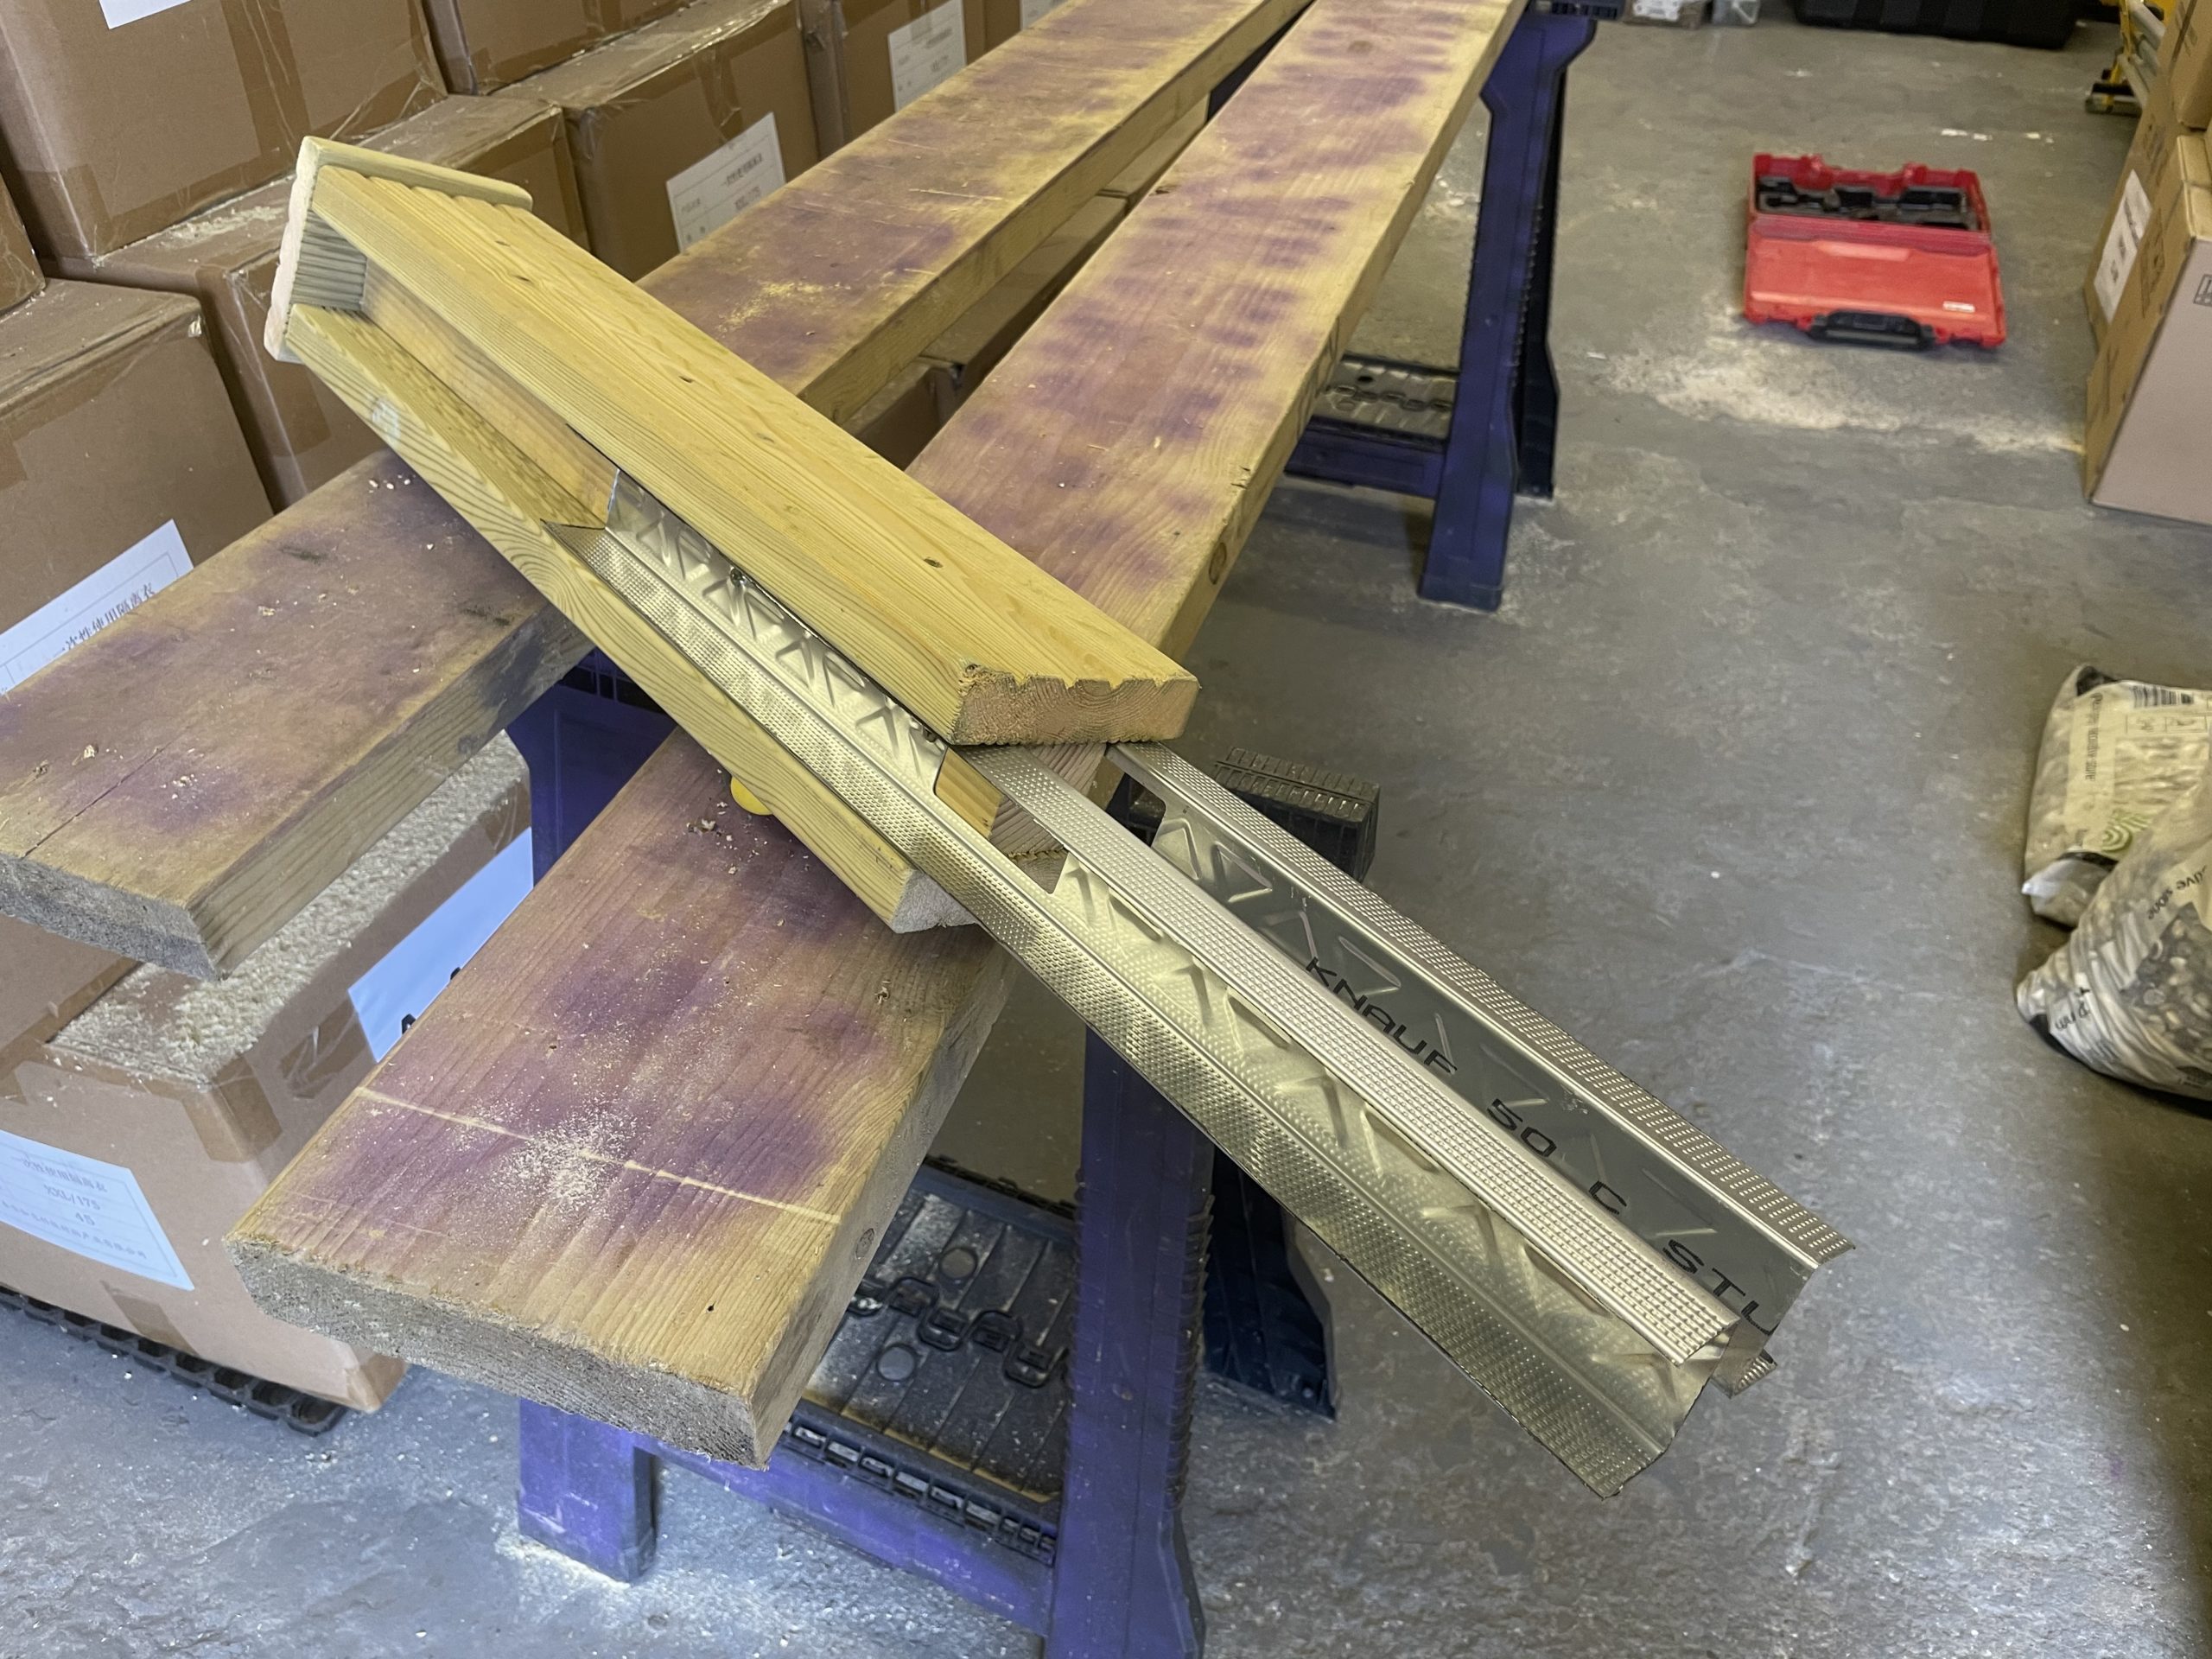
11. To fit your newly created fence post extender to your fence, slide the exposed 300mm of U Channel into the gap between the slots of the concrete post and the existing fence panel.
12. Repeat steps 1 to 11 to create enough fence post extenders for your garden.
13. If required, you can predrill and fix the trellis more securely to one side using another screw.
Please don’t forget to leave feedback on this article!
By the Helping Hands team
First published: June 2021
Last reviewed: December 2024
Next review: December 2025
